A method of making a house’s bed with its own hands, the nuances of work
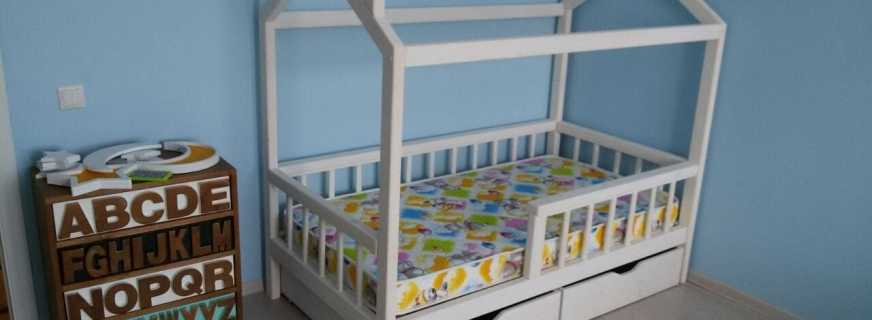
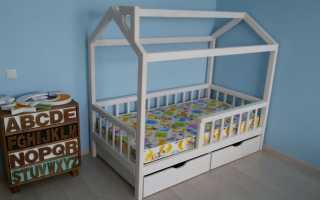
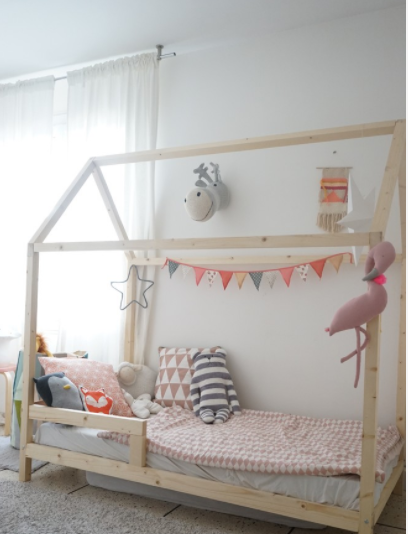
The Scandinavian style for children's rooms is gaining more and more popularity, and a do-it-yourself bed-house is a real manifestation of parental care, skill and imagination. The original design of the bed, made taking into account the size of the room and the age of the child, is beautiful, safe and economical. Adults can be sure of the reliability of the design of the bed, and children - in the presence of a place to rest, like the heroes of fairy tales.
Content
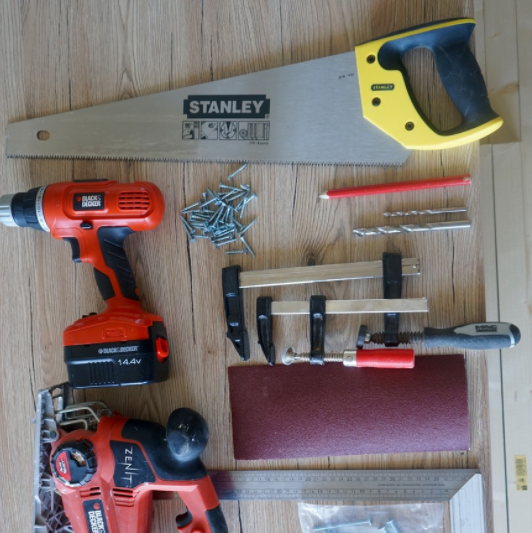
The main stages of work
There are a lot of options for making a bed-house. In terms of construction work more and more standard, it is important to draw up a diagram of the proposed product, having prepared the necessary materials.
Walls of the house
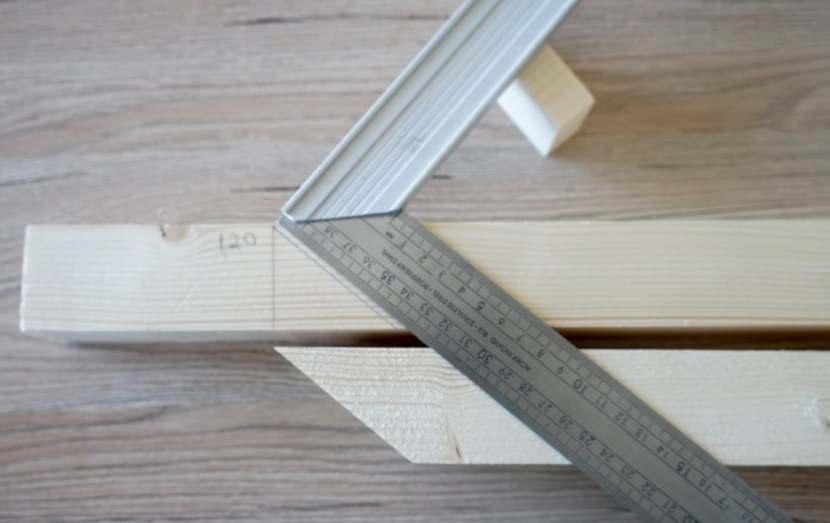
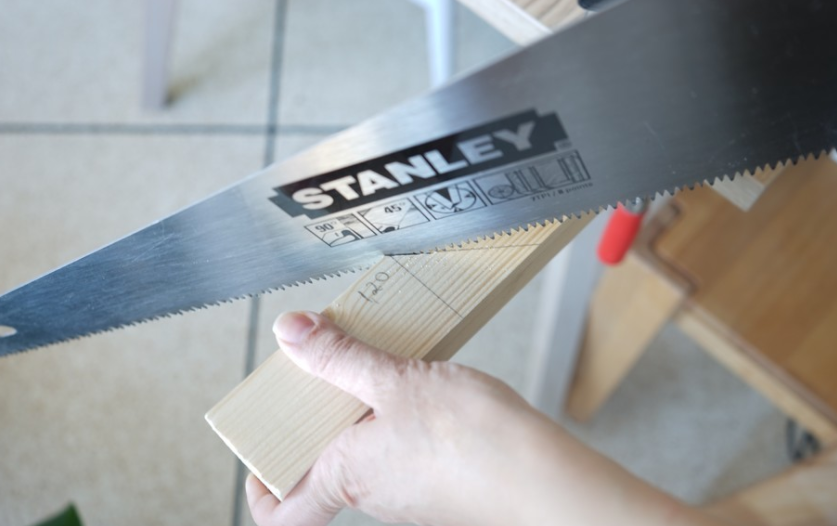
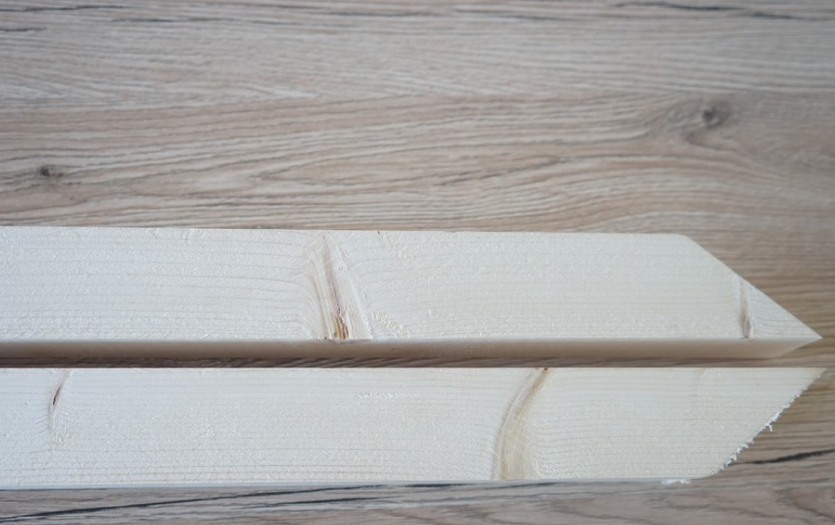
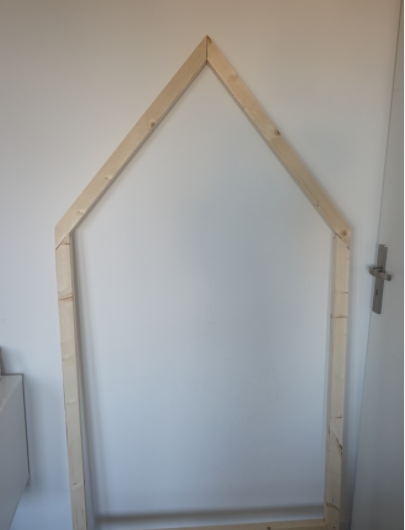
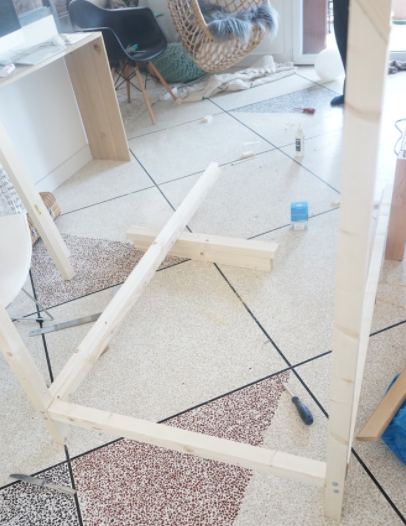
First of all, drawings are made for the bed-bed, using a simple pencil and a square. To build the walls of the described bed, four wooden beams are taken, each of which is 1 m 20 cm. These will be the supporting parts for the vertical structure of the bed of the house. To give a gable roof aesthetics, all supports are sawn off at the edges to form an angle of 45 degrees.
Roof
This part of the crib bed will also require four bars and the same steps, including edge processing at a 45 degree angle. All processed bars are assembled, the top skate is attached with wood glue. Parts can also be fixed with a self-tapping screw, which should be screwed at a distance of 3 mm from the border of the junction of two wooden parts. We advise you to follow some rules when working:
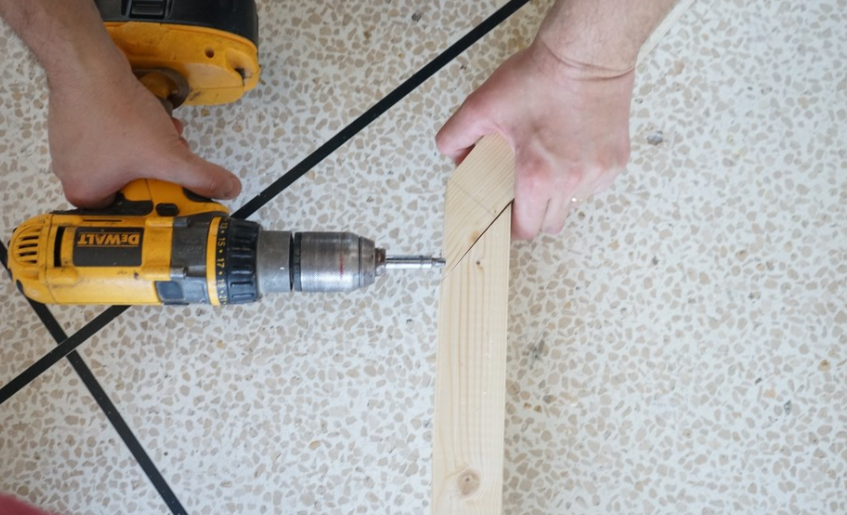
- it is recommended to clean all sections with sandpaper;
- the screw must be screwed in slowly so as not to delaminate the tree;
- during drilling, it is recommended to use a vice to secure the product;
- optimal modern drills and a slow process are the key to quality work.
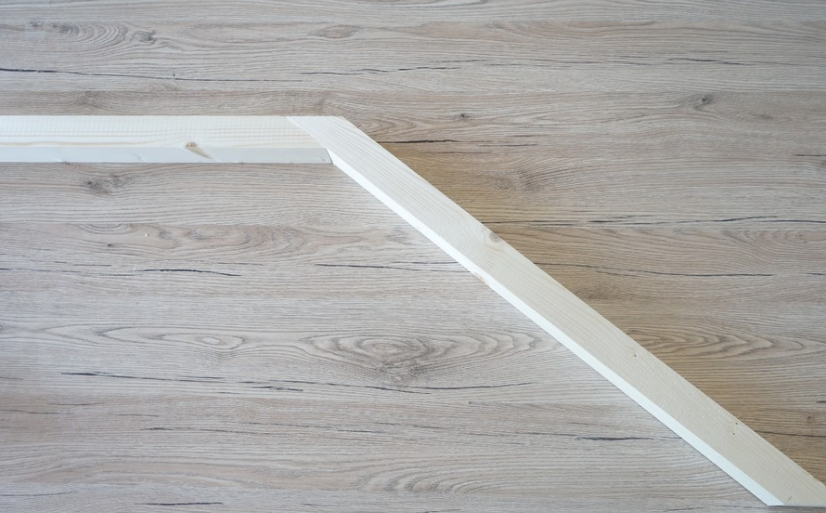
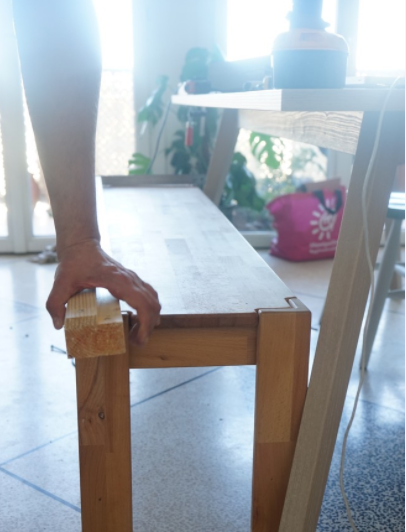
When two slats are fixed to the two pillars of the future bed, the frame of the house comes out as a result. Repeated procedure will lead to the appearance of two equal frames - the end walls of the bed.
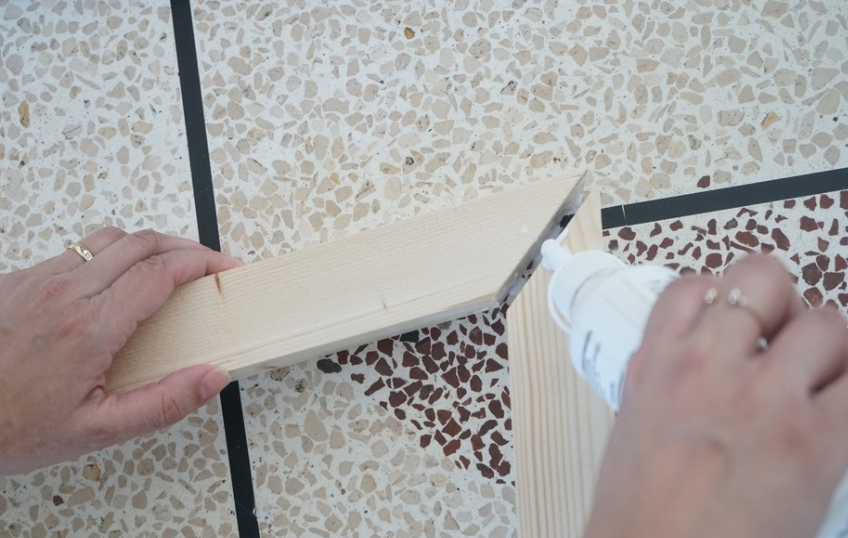
Gluing parts

End frame mount
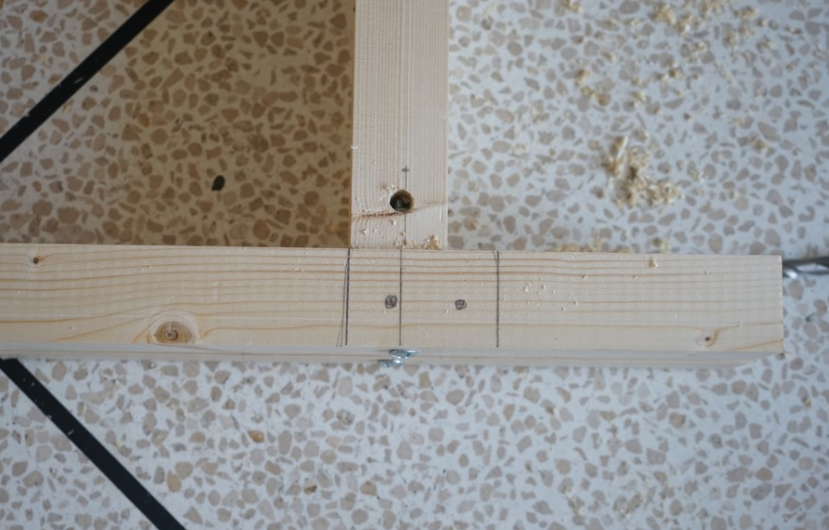
To complete the manufacture of the end frame of the bed, a 8.2 cm block is screwed down to maintain vertical struts and stabilize the entire structure. For bed assembly, an eccentric screed of the side components is preferred. It is very important to make an accurate project for the desired hit. Self-tapping screws will help to ease the task. The design is also attached to simplify assembly and save time with flat corners - squares with a side of 3 cm. All accessories for the procedure are available in the hardware store.
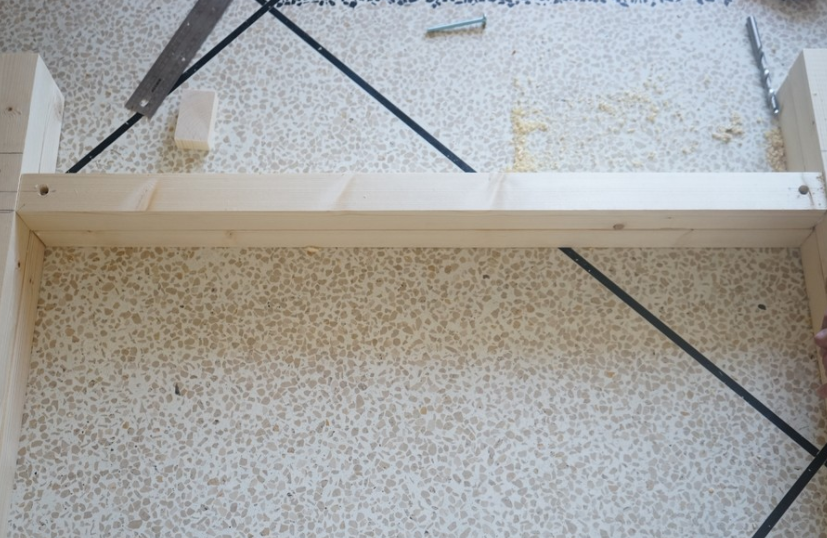
When doing this screed, drill holes in the crossbar with a 10 mm drill.They should be on its midline, not be through and have a depth of 12.5 cm. The diagram shows how to fix their outer edges 3.5 cm from the edge of the crossbar.
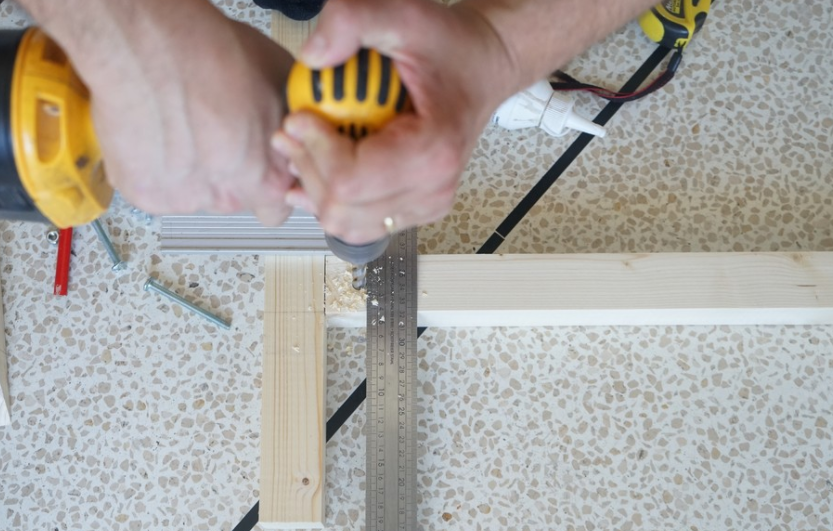
A 6 mm drill helps form a hole in the side. It is fixed exactly in the middle and ends up in a well prepared in advance. Then the eccentric tightly fixes the necessary appearance of a screw. It is possible to use wooden parts on long self-tapping screws with preliminary sizing. We should not forget only about stabilizing the connection with the help of corner brackets.
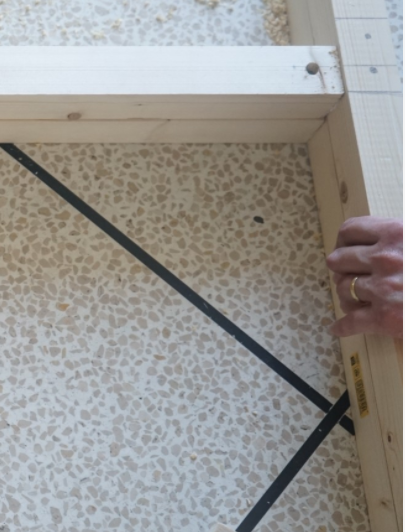
Gathering the foundation of the structure
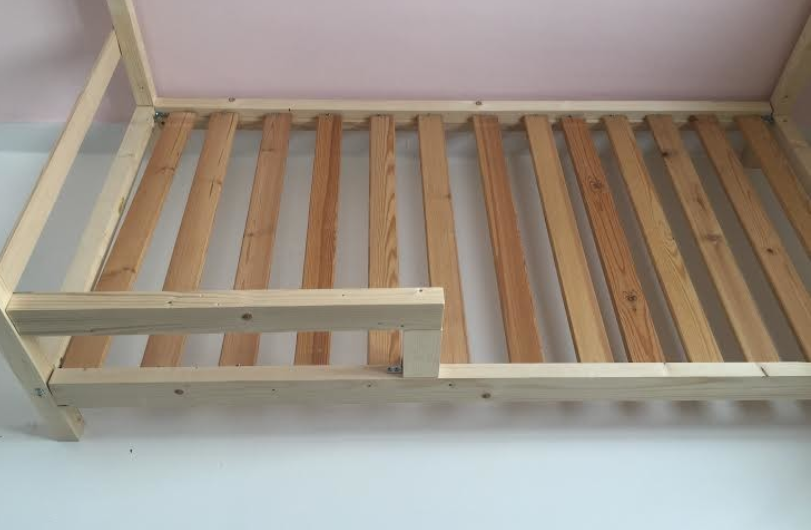
Two thick bars are harvested, like side bed sides. The inner side of the beam holds thin strips with the help of self-tapping screws and involves screwing in screws at an equal distance from each other. These details will be a support for the frame of the future bed of the house, which will make it possible to fix the bed slatted bottom.
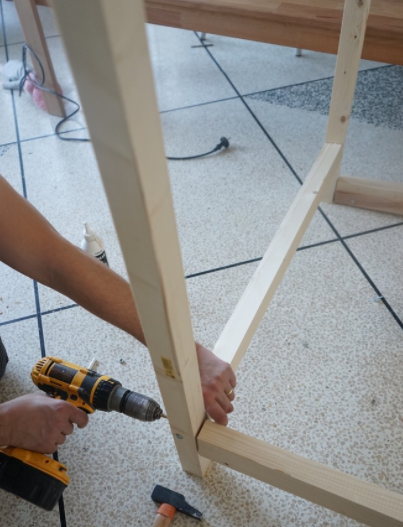
It is important for accurate work to make a template measuring 6 cm with holes for self-tapping screws - 2.5 cm. The positions of the holes on all racks are marked with a pencil for the upper edges to completely coincide with the crossbar. A 6 mm drill is an assistant in organizing through holes in the marks. The procedure is fourfold: thus, all racks are connected to the sides of the bed.
Next, prepare the place of the hole for the eccentric on the longitudinal strut inside. Outside, long self-tapping screws are twisted, which should smoothly connect the side components of the bed and the vertical support with a possible gluing of the docking place. The eccentric is inserted into the holes from below and then the bolts are tightened. Repeat the procedure to connect both frames to the sides of the bed.
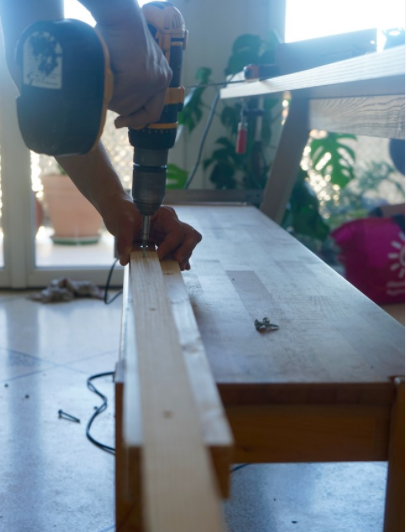
After fastening the sides of the product to the ends of the bed of the house, it is assumed to fix the frame, thanks to the three longitudinal components of the roof. Three beams according to the size of the sides are attached using an eccentric or self-tapping screws and glue. When choosing the latter, the bed-house must be strengthened with corner fasteners.
Rack bottom
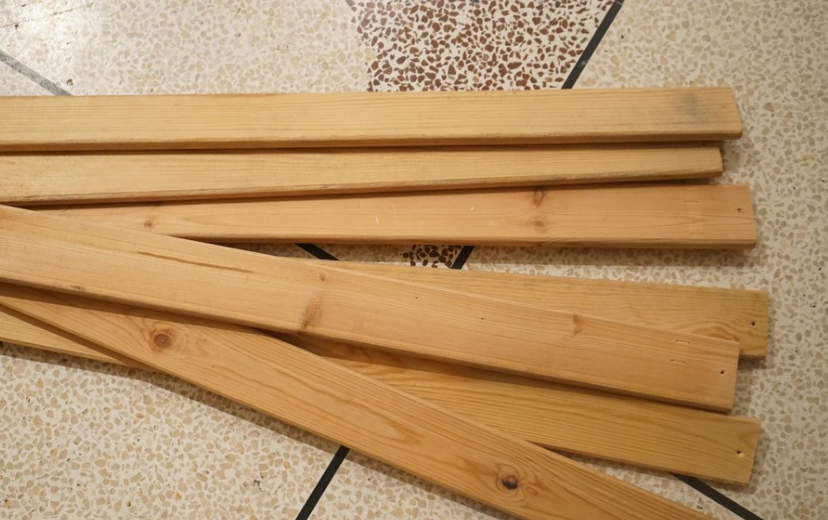
The slats are screwed to the flat strips, which, in turn, are fixed to the side frame sides. It is important to carry out the correct twisting to hide the screws. The interplanar spacing is an average of 7 cm, 13 parts go to the bottom. The remaining lamellas are suitable for the safety rail assembled using corner brackets, but this is not necessary.
These slats can be borrowed from other beds. There are new types of bed slats for sale. There are also ready-made models that are inserted directly into the bed frame. This option is suitable for beds of standard sizes.

Dressing
The self-made bed-house bed has an indisputable plus - it includes author's proportions, colors and sizes. For the boy version, you can use a canvas of a marine hue or blackout curtains to organize a military headquarters, and for girls - decor with flags and a canopy of organza or tulle.
Constructed crib houses can be open and closed. The first option is just some imitation of walls and roofs, but at the same time they seem light, without cluttering up the bedroom space. And the closed model of the bed house is more functional, with a roof, walls, railings and even lighting.
A crib of the described type can become not only an original place to sleep, but also for games. And the imagination of all family members will help in decorating:
- a house stylized as a fairy-tale palace for little princesses;
- marine, military style for adventure lovers;
- castle for young knights;
- soft house hut and much more.
Whatever you choose, the most important thing is to guarantee a safe pastime in the absence of risk of injury.It is important to pay attention to the quality of the fabrics in the decor with the coating. It is better to give a choice to fabrics that do not crumple, are dense, well colored, do not cause allergies and static stress.
When designing a house’s bed in color, one should not forget about harmony with the overall design of the room. A bright, juicy palette with a variety of decor inserts will be very appropriate. A beautiful house, organically blending into the interior, will contribute to an excellent mood in combination with the mental health of children.
Video