DIY workshops for beginners

In a large assortment of furniture stores, chairs of various types are presented, but it is not easy to choose a convenient model that fits in size. And the cost of goods does not always correspond to its quality. A profitable alternative is to make a chair with your own hands in a home environment. Having spent a little time and money, you can get an exclusive product as a result.
Content
Wood selection
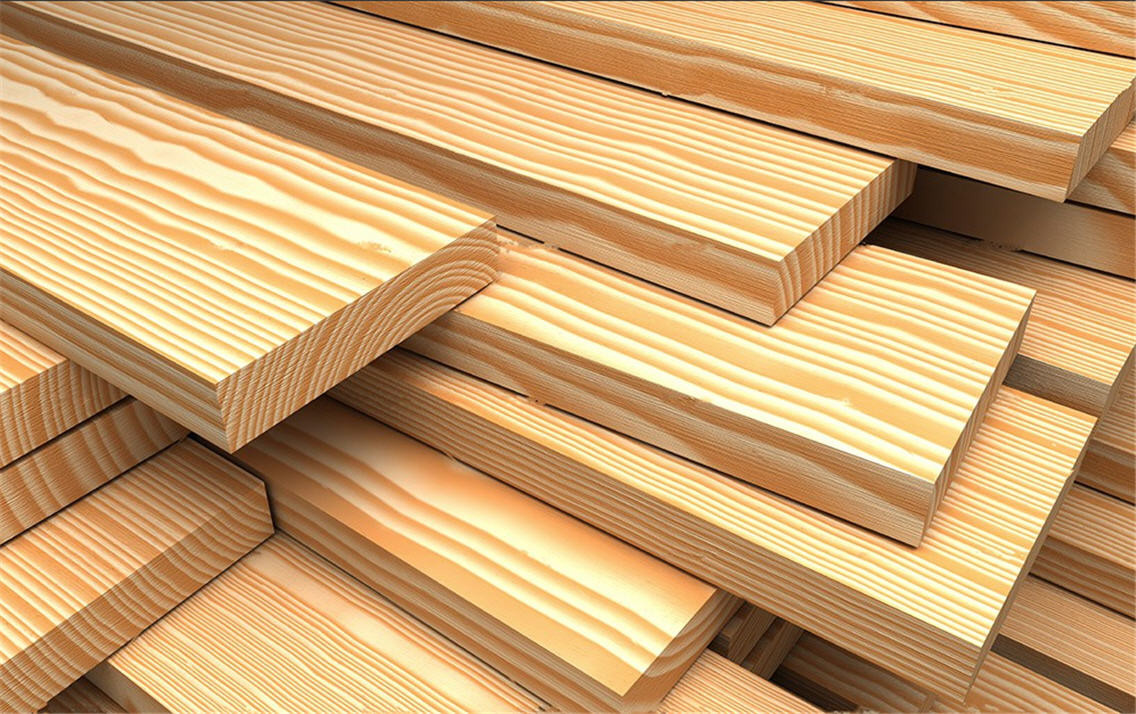
You need to start making a chair with your own choice of wood species. They are hard and soft. The first include beech, oak, birch, maple, walnut, cherry - all have high strength and resistance to deformation. Products made of such wood can serve for decades, but it is more difficult to process them, since such materials have a dense structure. They are also distinguished by high cost.
Soft wood species - pine, spruce, linden, aspen, alder and others - are more prone to scratches and chips. They are inferior to solid in practicality. Their advantage is that thanks to a looser, straight-layered structure, it is convenient to saw, cut, grind and glue such wood. Products are light, elegant. Materials from soft rocks are much cheaper than from hard ones. There is especially strong wood (yew, acacia, boxwood) - it is better not to tackle it at home.
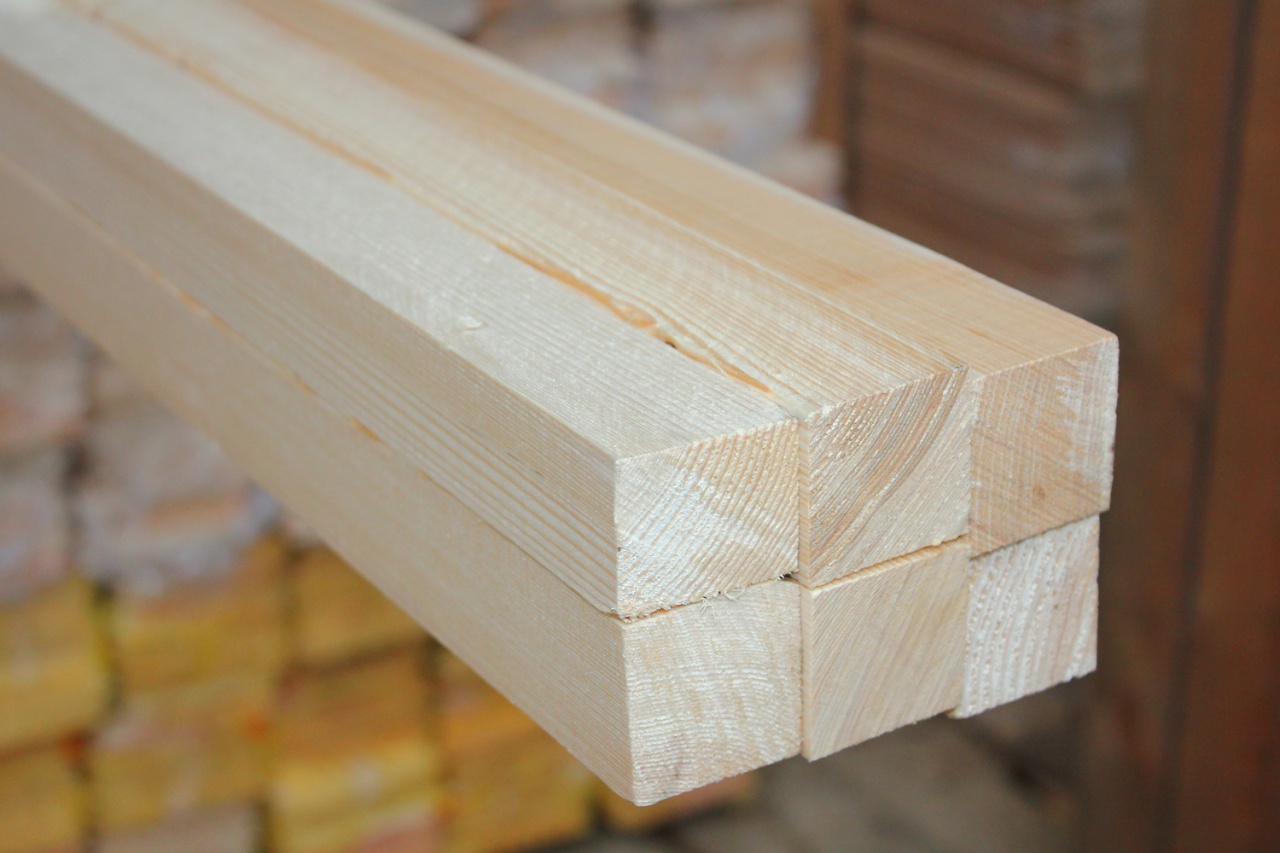
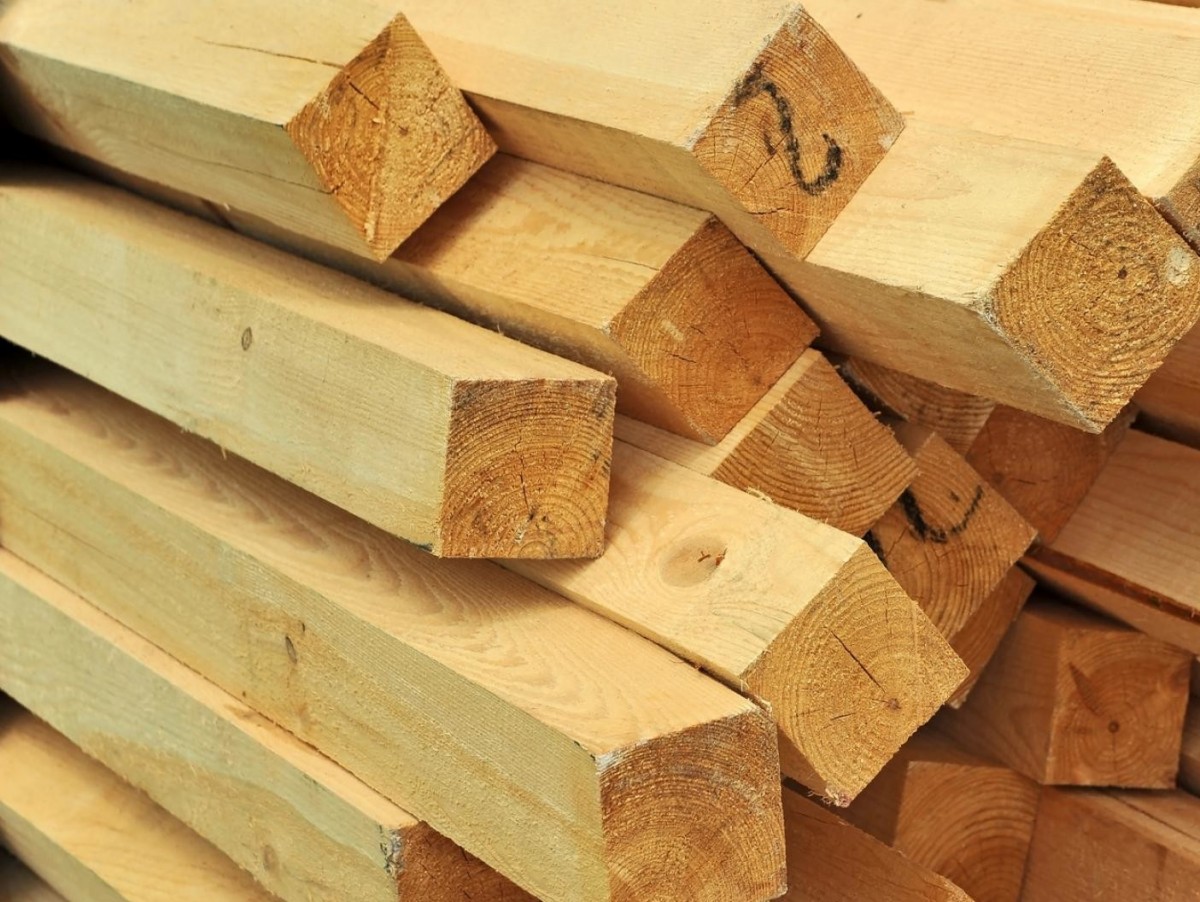
Typically, chairs are made of timber (with a section of 60 by 40 mm or 40 by 40 mm) or boards with a thickness of 10-15 mm. You can also make furniture from a log, for this it must first be dissolved. This is done independently on a makeshift bed with a grinder with a circular saw. In the absence of skill it is better to entrust the cut to professional joiners.
When purchasing blanks, you need to check the quality of lumber. If the rules for drying wood were violated, then this can be determined by external defects: cracks on the surface, warpage of the tree (bends, bumps) and resin acting in separate places. Also, you can not use boards that are stored in damp rooms to make a chair. All these factors negatively affect the strength and durability of wood.
Qualitative materials for chairs should be selected according to the following criteria:
- flat surface, without knots, bends and distortions;
- lack of cracks and chips;
- the wood is dry, without signs of mold and wormholes.
Before starting work, it is useful to treat lumber with special antiseptics - this will increase their moisture resistance, prevent infection with the fungus.After impregnating with such a composition, a chair made of solid wood is more durable and durable.
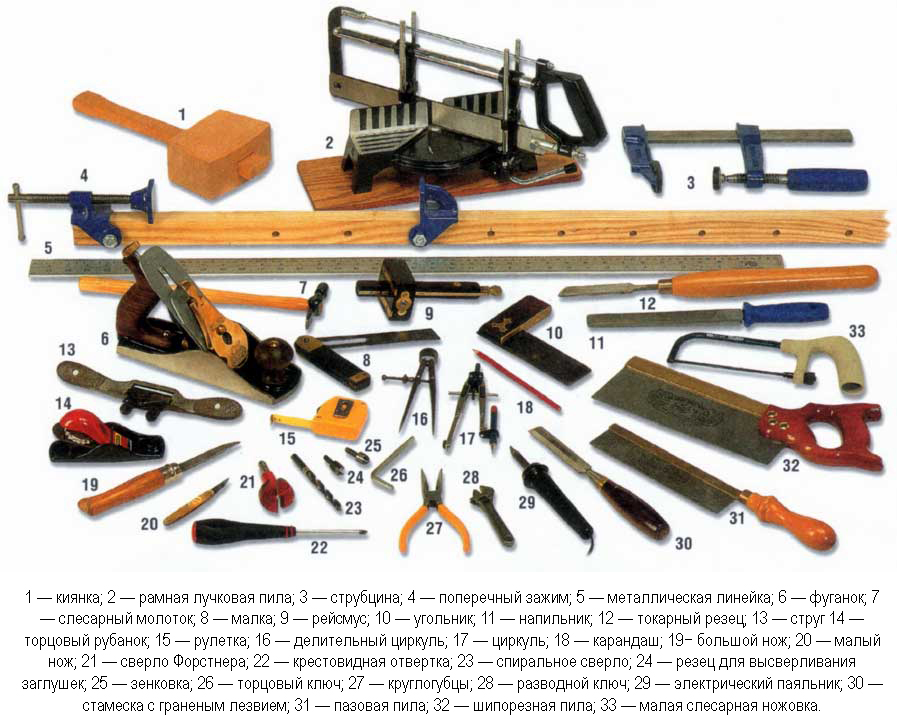
Tool and hardware
So that the manufacture of chairs does not require extra costs, you must immediately decide which model to make. For a simple form option you will need:
- saw or electric jigsaw - to give the details the right size;
- a planer and sandpaper - for polishing wood;
- screwdriver or drill - for making holes and screwing in screws;
- mallet (carpentry hammer) - dowels clog them;
- a small chisel - needed to make connections;
- furniture glue - they stick together all the joints to give structural strength;
- self-tapping screws - are necessary for additional strengthening of all glued areas, as well as for fixing the seat;
- tape measure and ruler with a right angle;
- putty;
- stain, wood varnish or paint.
The presence of a conductor for furniture will greatly facilitate the work - this simple device helps to make the necessary marking of joints quickly and accurately. Clamps will also be useful, which firmly fix the wooden parts at the time of processing or fitting, which eliminates distortions. Quickly and efficiently round the corners of the workpieces with a hand milling cutter (if not, then use a plane).
Putty can be replaced with a homemade mixture. For this, the sawdust must be mixed with PVA glue, and then the resulting mass should be coated with a self-tapping screw cap or an erroneous hole.
Design features
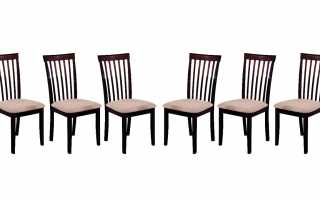
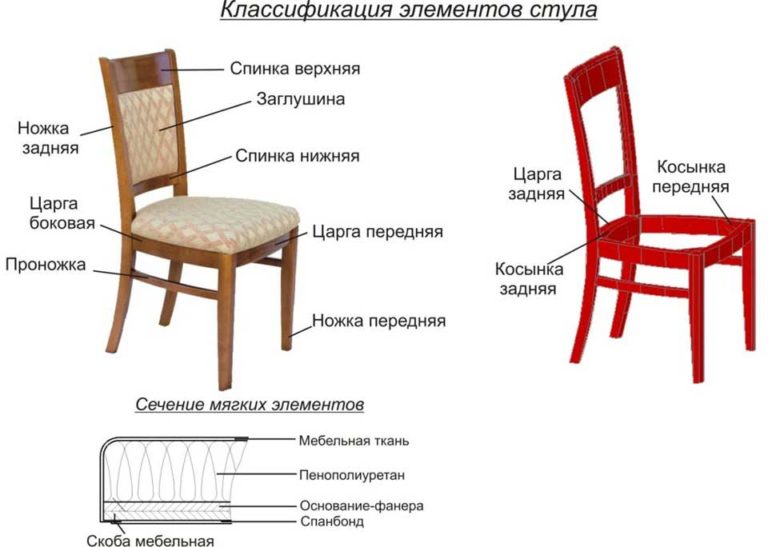
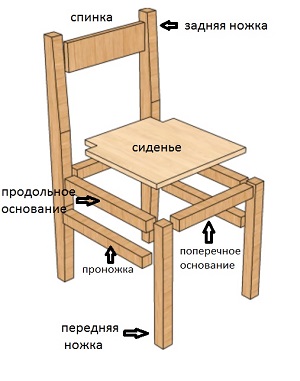
It is better for a beginner in the carpentry not to take up models of chairs with thin carvings, curly elements or curved backs. Often, beginning craftsmen train to make stools to gain experience. If they are not required on the farm, you should not transfer materials and time to them. Having carefully studied the manufacturing instructions, you can immediately make a wooden chair with a simple design. This is a universal piece of furniture, which due to its design will serve a long service. It will perfectly fit into the interior of a country house, and can also be used as a kitchen chair. A regular model with right angles will require the following details:
- 2 back legs;
- 2 front legs;
- 4 tsars, as well as horizontal slats that strengthen the seat, the entire structure as a whole;
- 3-4 stitches - connect the legs below, which gives the chair additional stability;
- seat;
- back.
It’s possible to install the prologs and czars in a larger quantity - it depends on the imagination of the master. The backs are also made in different ways. For example, you can make several narrow strips and arrange them vertically, fastening the top and bottom transverse parts. Or make one wide bar and connect it to the rear legs. The advantage of this model is ease of implementation. Among the shortcomings, only too primitive design can be distinguished, which will lose against the rest of the furniture.
The sketch and drawing of the future exclusive must exactly match its purpose. For this reason, it is initially worth determining whether it will be just a chair for sitting or with additional functions.
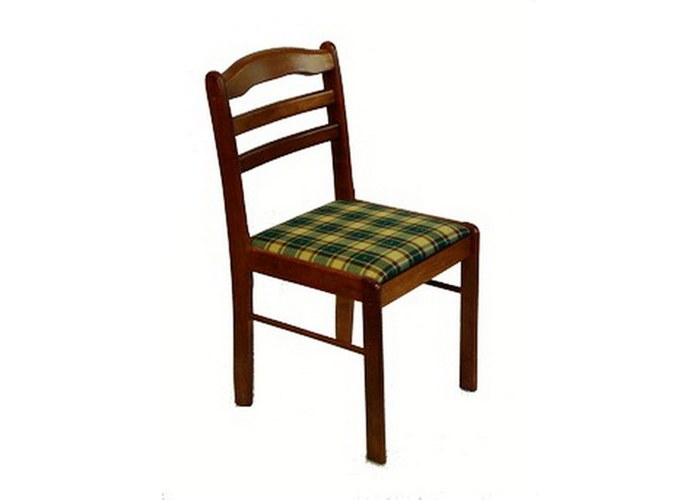
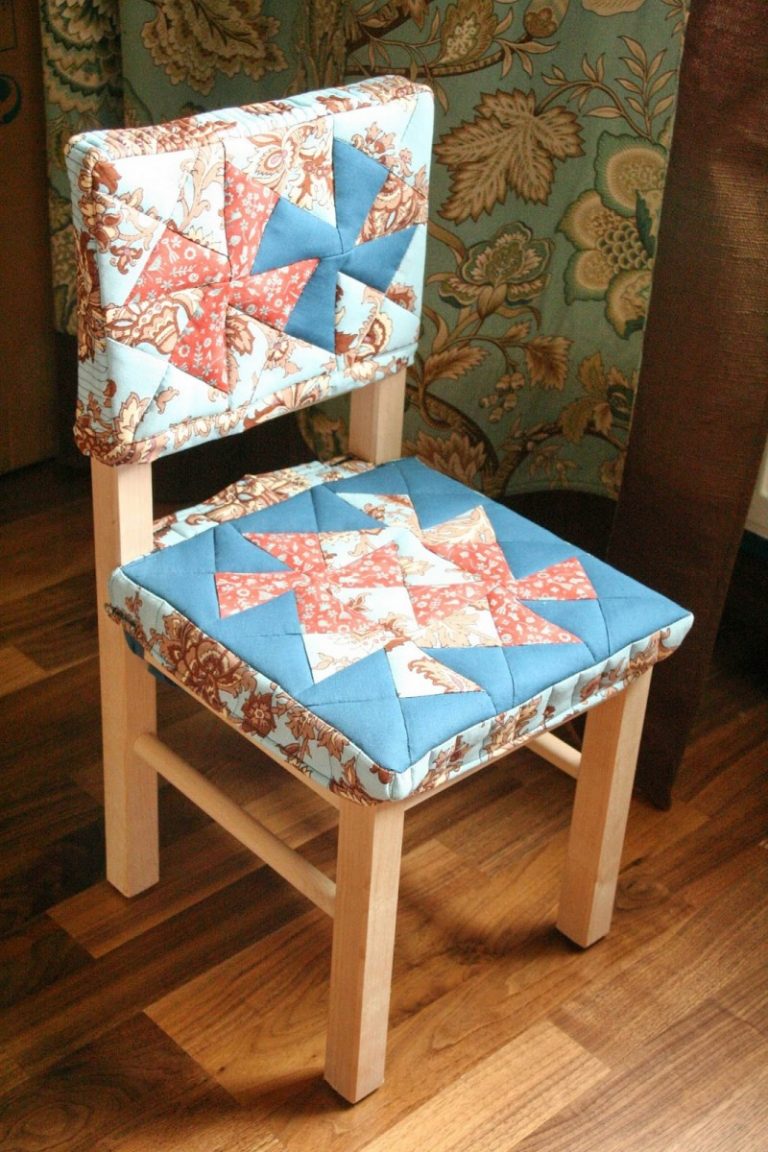
With padded seat
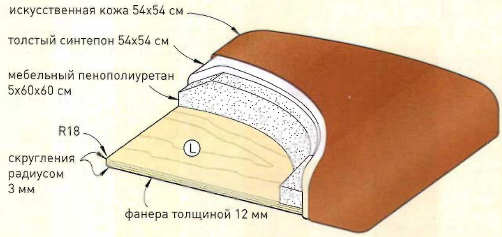
Visually, this model looks like an ordinary chair, but its upper part is upholstered with foam rubber and fabric. To make an option with a soft seat, you will need the ability to work with a stapler. You will also need to stock up on additional details, tools:
- A piece of plywood. The seat is cut out of it with a jigsaw exactly to the right size.
- Foam rubber with a density of 40 kg / m, a thickness of 40-60 mm. You can replace it with batting or synthetic winterizer.
- Upholstery fabric. For soft seats, tapestry, velor, flock, courtesan, leather or dermatine are suitable.
- A sharp knife with a long blade. It is convenient for them to cut foam rubber.
- Manual or electric stapler. With it, the seat is upholstered with fabric.
In addition to the seat, you can also make a soft back.In this case, it is necessary to correctly calculate the amount of material so that it is enough for both parts.
The advantage of independent production of such chairs is the ability to choose the optimal size, taking into account the peculiarities of the physique. However, you need to take the choice of texture seriously. For the upholstery of kitchen chairs, you can not use genuine leather, since it stretches from moisture and begins to puff over time. It is better to choose a jacquard - this material has excellent water repellent properties.
Chair-chair
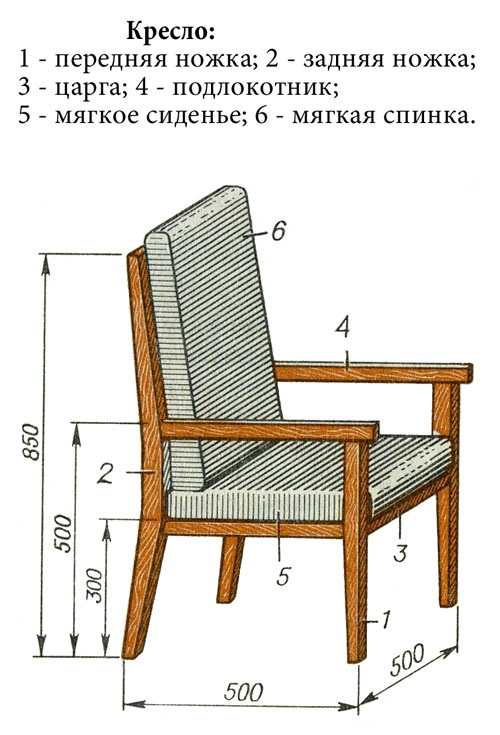
The main advantage of this model is the presence of armrests. In addition, it looks more presentable, and if you decorate with fabric, you get a pretty stylish piece of furniture. An amateur carpenter can easily make a chair of this shape with his own hands. The easiest way is to make a model with a straight back. For stability, it is better to make the legs wide using a 15 mm board.
The front legs should be longer than in an ordinary chair, then to connect their upper part to the armrests. They are made with a width of 8-10 cm from a board of 10-15 mm, the edge is usually rounded to make it more comfortable for the hands. For fastenings, furniture bolts will be needed - with their help, the frame of the chair-chair will be assembled.
For an untrained craftsman who does not have the skills to work with wood, this design can be too complicated.
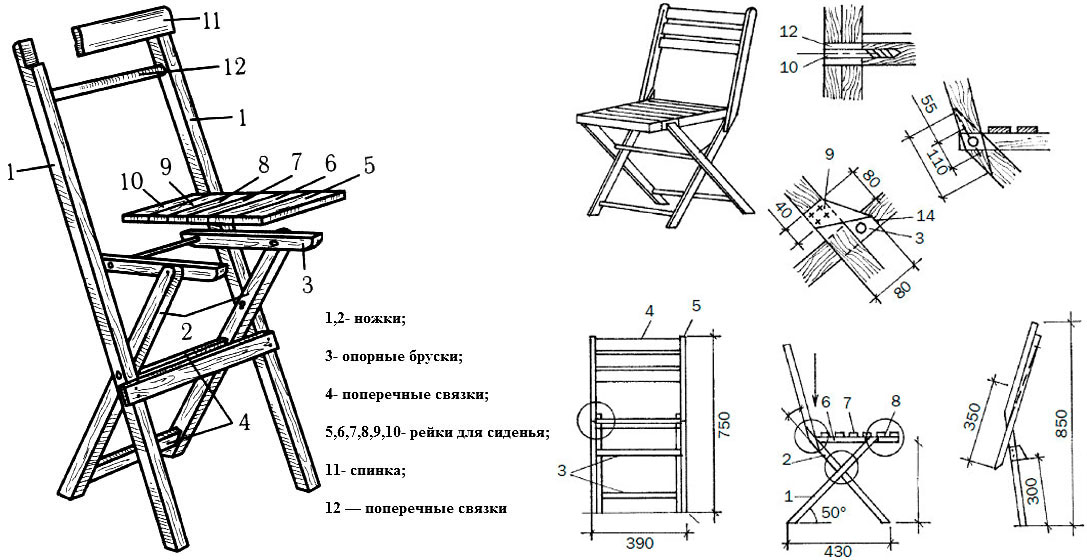
Folding
Great solution for small rooms. Thanks to the folding legs, it can be quickly assembled and disassembled. There are also disadvantages - lack of back, fragility. Experienced craftsmen recommend performing a folding chair from hardwood boards - oak, maple, birch, elm, then the model will be strong and stable. Pine planks are less durable. As a basis, you need to take 2 long slats, which will serve as front legs and backrest, when a transverse board connects them from above. The rear legs are attached to the seat. They, unlike a regular chair, are shorter than the front ones.
In the folding version, it is important to position the central axis correctly so that the seat is not very high. To assemble a chair of such a model, additional fasteners will be required: furniture bolts and nuts with washers suitable for them. Such furniture is usually made according to the sketch, so it is very important that the master knows how to work with drawings.
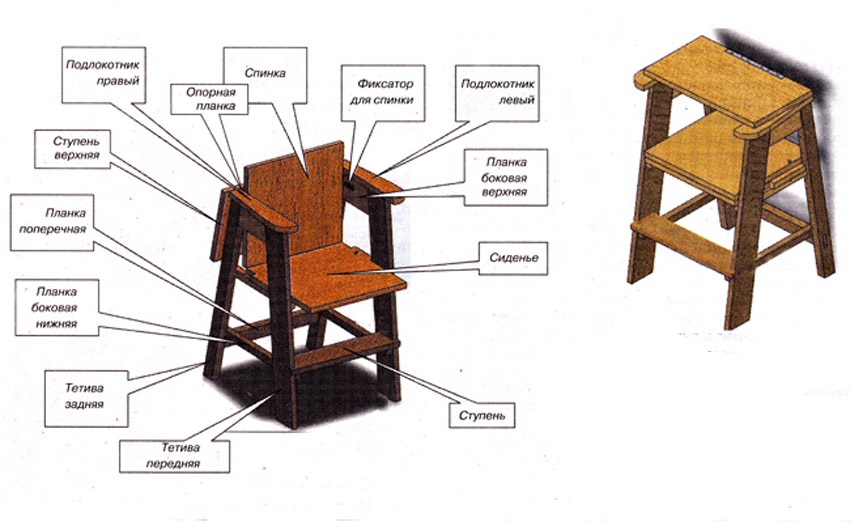
Transformer
Outwardly, it looks like a massive chair with a back, and if you expand it, you get a ladder of 2-3 steps. The main advantage is height. With it, you can get to the top shelves of cabinets, remove curtains, and in general such a chair is very useful, especially during repairs. Among the shortcomings, one can single out that it is heavy and takes up a lot of space. If you are doing this model for the first time, it is better to choose a drawing of a chair without intricate shapes of legs and additional elements (for example, there is a design in which steps protrude in a spiral). In addition to other materials and tools for such a chair, you will need a piano loop and 2 sets of guides - with their help steps will be advanced.
It is not easy to make such a wooden chair with your own hands. This will require skills in working with a jigsaw, drill, plane.
How to determine the optimal height and dimensions
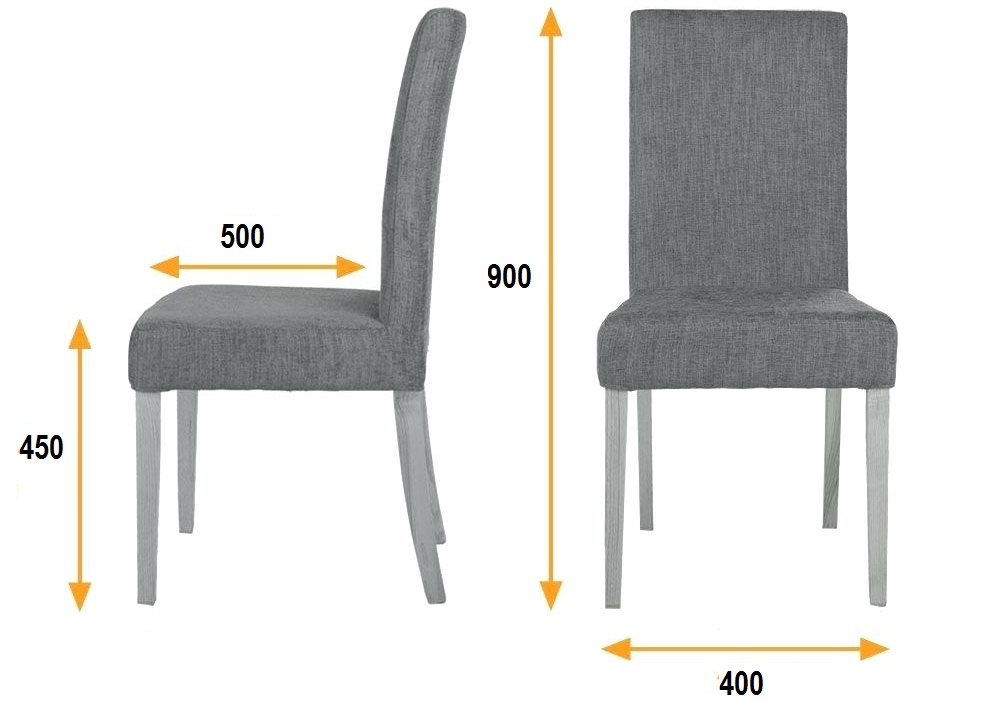
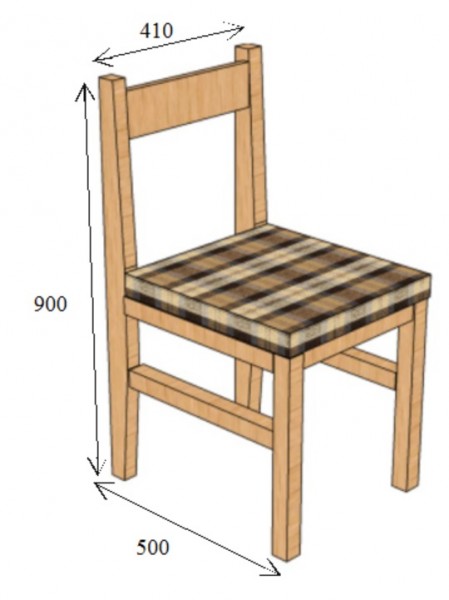
Thanks to the science of ergonomics, optimal chair sizes have been developed so that a person feels comfortable while sitting. These standards are designed for men with a height of 170-175 cm, and women 160-165 cm. The optimal parameters are as follows:
- chair height from floor to seat - 400-450 mm;
- seat width - 400-450 mm and depth - 500 mm;
- the distance from the floor to the end of the upper edge of the back is 850-900 mm;
- back width - 300-400 mm;
- the back is straight or under a slight slope of 8-12 degrees.
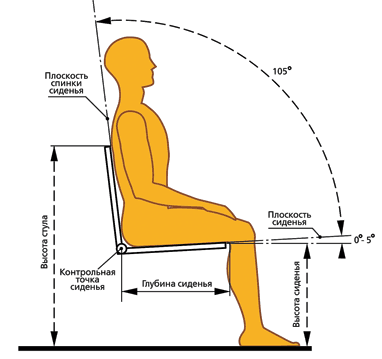
Designed chairs according to GOST for people weighing up to 100 kg. Drawings and sizes with standard parameters can be used by those whose height and weight correspond to average data. The rest, in order to learn how to make a chair on which it will be comfortable to sit and not spoil the posture, you need to take your measurements.To do this, you need to sit down, keeping your legs at a right angle and measure the distance from the floor to the inner bend of the knee - this will be the height to the seat. Then measure the length from the knee to the hip - this is the depth of the chair. The distance from the thigh to the neck will help determine the height from the seat to the upper edge of the back.
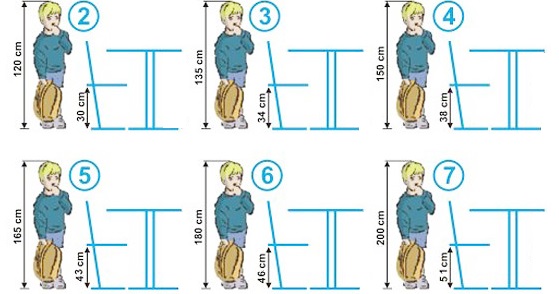
There are other regulations that will help you make the right choice. Correspondence of human growth to stool height in cm:
- 146-177 - 43 cm;
- 159-188 - 46 cm;
- 174-207 - 51 cm.
In this case, the angle of the bent legs should be equal to 90 degrees. The most convenient is the position of the body, in which the seat depth is 2/3 of the length of the hips. With this position, the correct deflection of the lower back is maintained.
Drawing adaptation
The easiest way to make a drawing of a chair with its dimensions is to recycle it already ready. To do this, replace the inappropriate parameters (the length of the legs from the floor to the seat and others) with the necessary numbers, and then draw the diagram according to the new introductory. To do this correctly and avoid distortions, it is important to take into account the proportions of each element and know exactly which details should be identical and which should not. Another important nuance - when replacing dimensions, you must observe the scale. There is a second option to get a drawing of chairs with a backrest - to enter their parameters into a computer program, which itself will draw a diagram.

Procedure
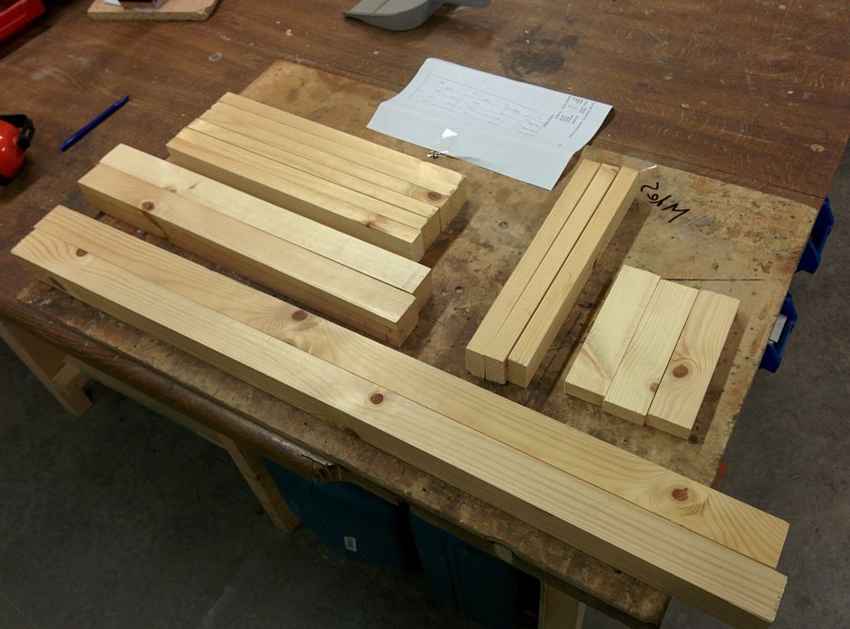
When the main drawing is ready with all the calculations of the conceived model, it is advisable to make a diagram of each part, especially if there are connecting grooves or holes. Making a wooden chair begins with cutting. On the board you need to put the pattern, circle it along the contour with a pencil and cut the blanks according to the drawing.
All components must be done without errors, with an accuracy of 1 mm. The slightest deviation will give an imbalance, and you will have to "fit" the part or saw another.
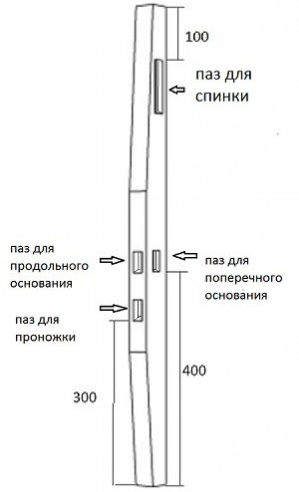
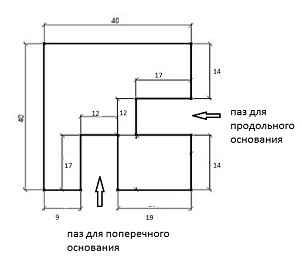
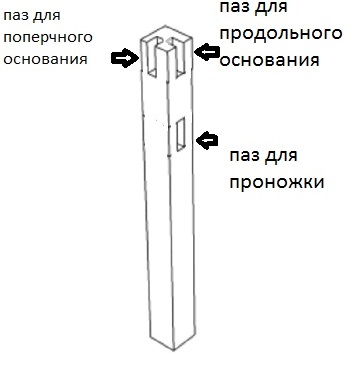
Parts preparation
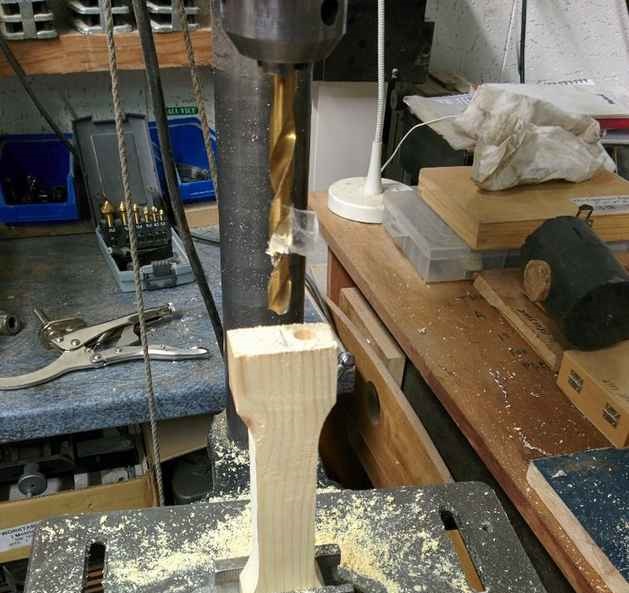
When the drawing is ready, you can start processing the bars to make them suitable components. To do this, it is necessary to cut out the necessary grooves for the joints on each part, indicated on the diagram. They are drilled with a milling cutter. If it is not, you can use a drill, which is first drilled several holes nearby, and then they are combined with a chisel. Then you should carefully grind all surfaces, removing bumps and possible wood defects. Round corners. Details for a makeshift chair are ready.
Grinding is done with medium-sized sandpaper.


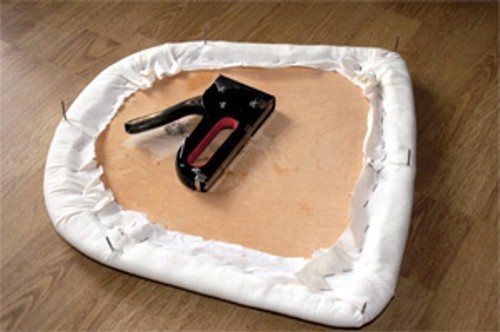
Create a soft seat
First, put the plywood blank on the foam and use a sharp knife to cut a part out of it with an allowance of 1-1.5 cm around the edge. Then cut out the fabric, cut it to the shape of the seat, adding 5-6 cm from all sides. After that, glue the plywood to the foam so that the parts do not slip when hauling.
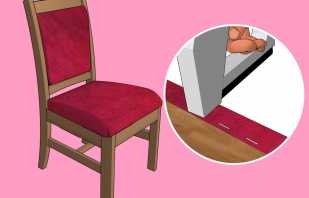
Put the workpiece with foam rubber down on the wrong side of the material, and then start hauling using a stapler. To drive brackets nearby, at a distance of 0.5-1 cm, so that the fabric does not puff. First you need to make 4 fixations in the center on each side - this will not happen distortions. Then the fabric must be pulled at the corners, after which the remaining sections are already secured with brackets. At the end, cut off the excess tissue.
Kitchen chairs have to be washed often, so it’s better to pull them with materials such as jacquard or dermatin.

Product assembly
A simple chair with a backrest must be assembled as follows:
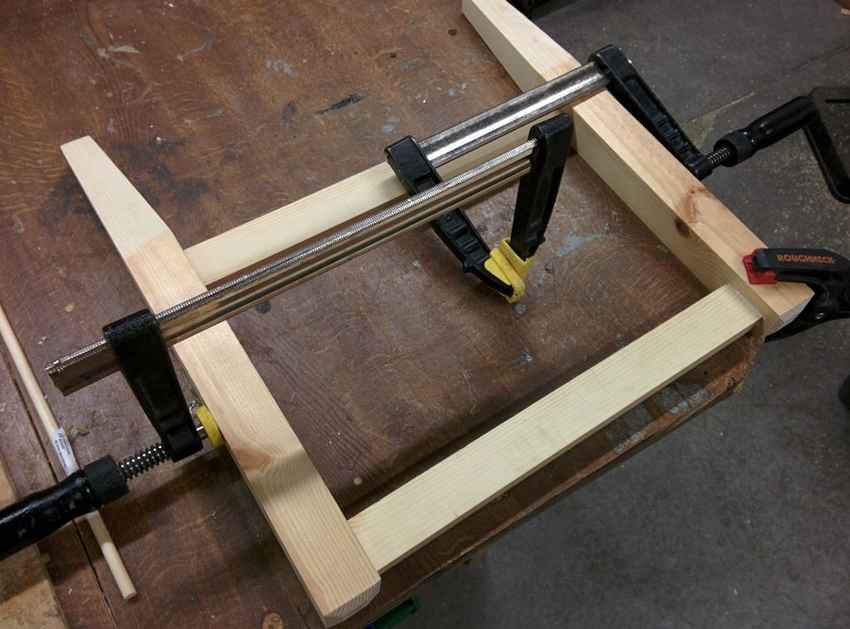
- glue the joints on the front drawer with glue, and then insert it into the grooves of the front legs (all fastened places must be pulled together with clamps for tight pressing and fixing the parts);
- in the same way, glue the rear tsar and the back of the chair into the hind legs;
- wait for complete drying, after which you can connect these 2 workpieces;
- carry out a test assembly of the chair frame and make sure that the structure is not skewed;
- disassemble the frame, glue all the joints, reassemble the chair.
After the glue has dried, you can attach the inner trims for the seat and install the seat itself. If there are grooves in the drawing, they are attached at the end of the assembly. The finished chair must be turned upside down until it finally dries.
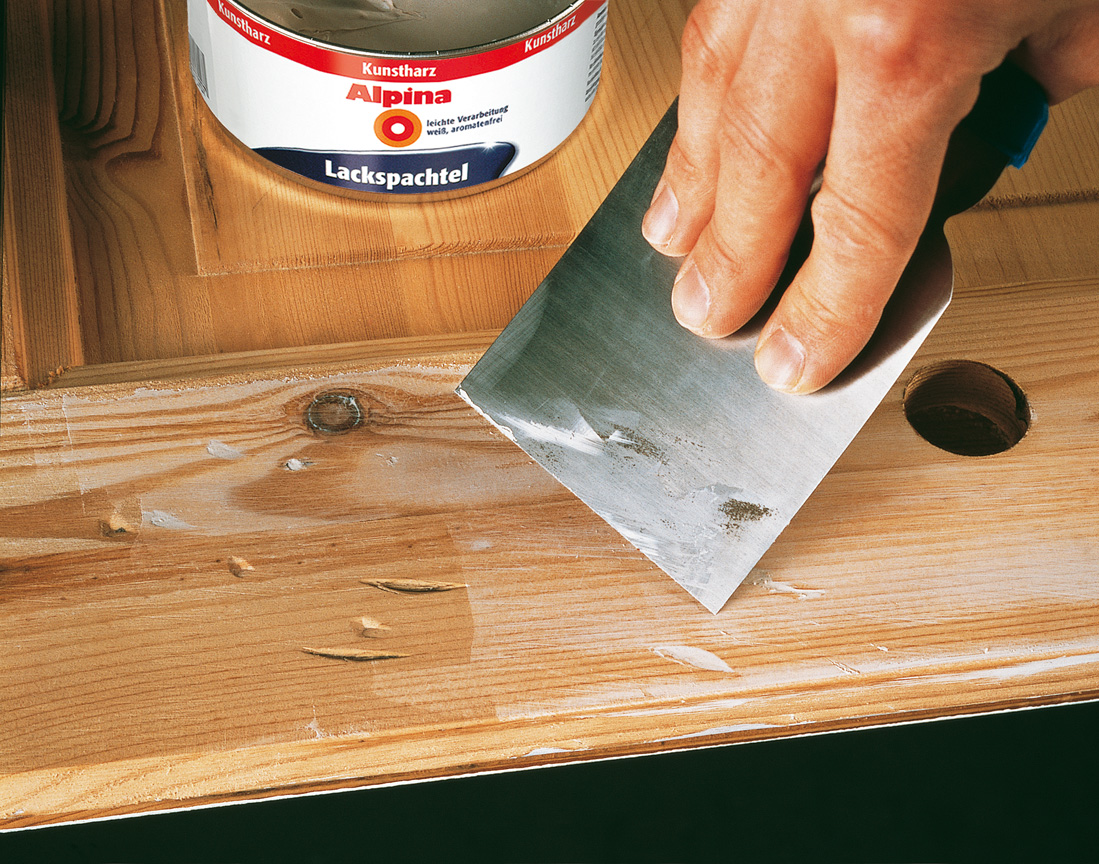
Finish finish
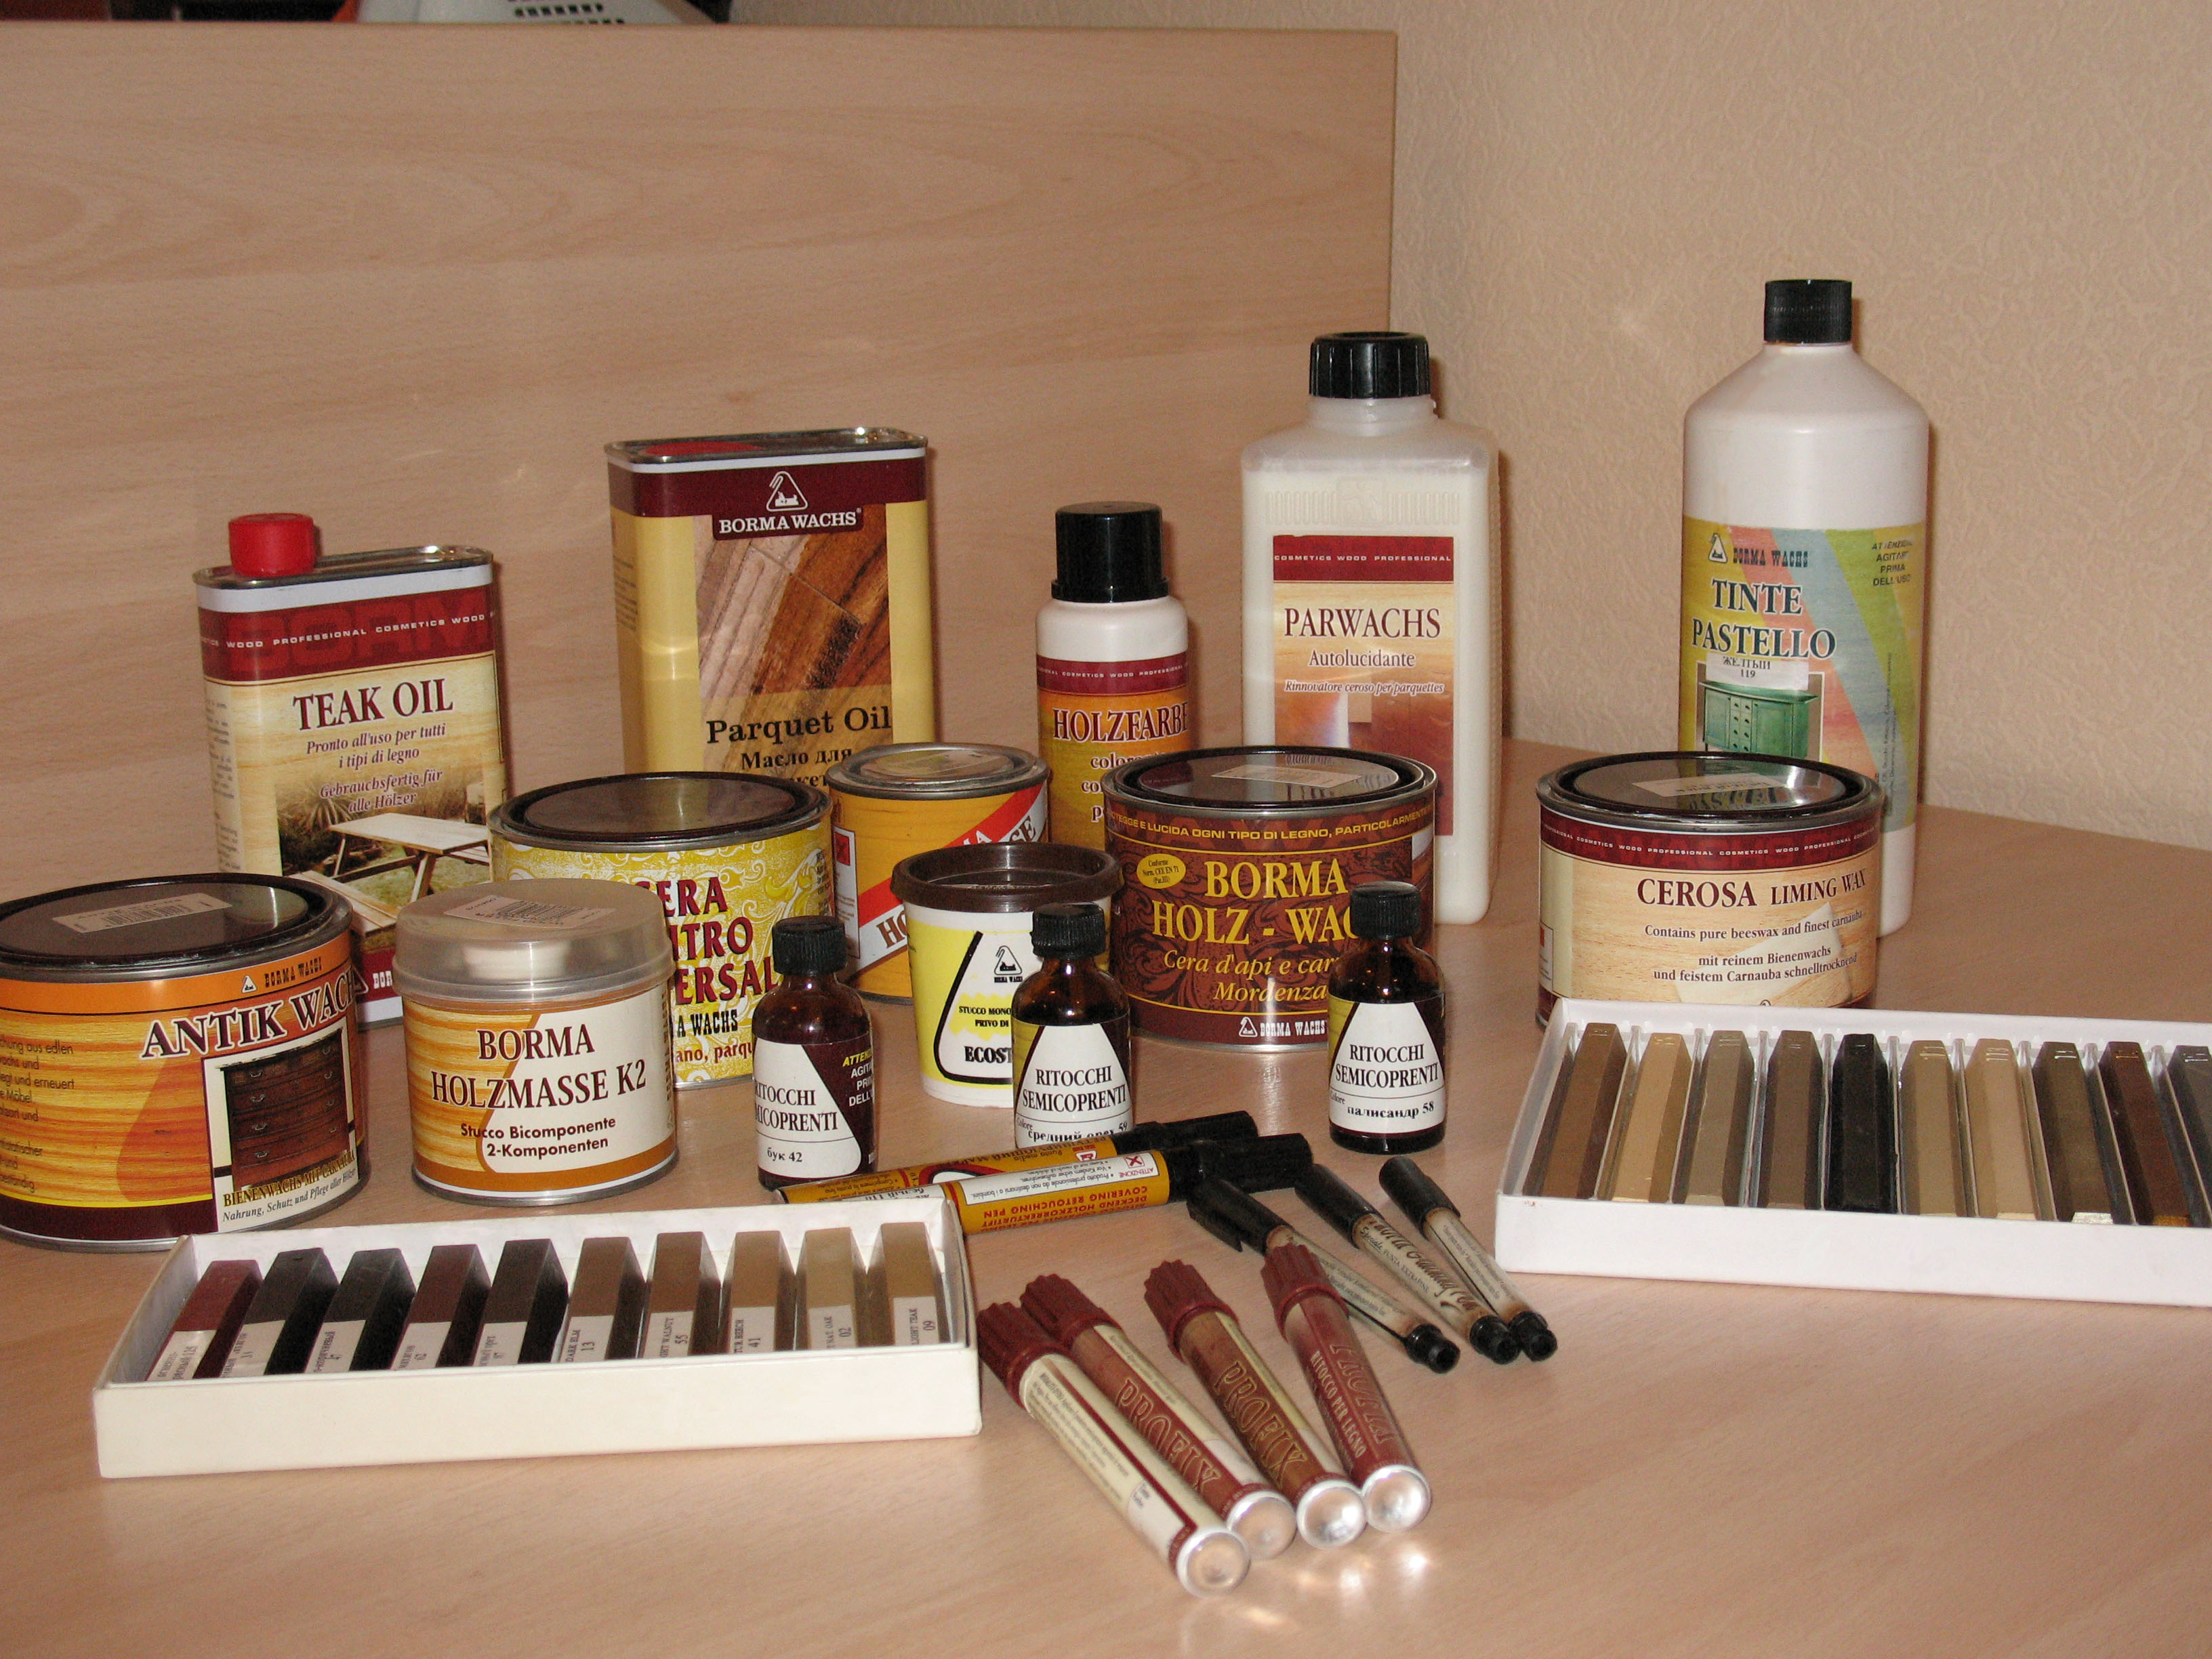
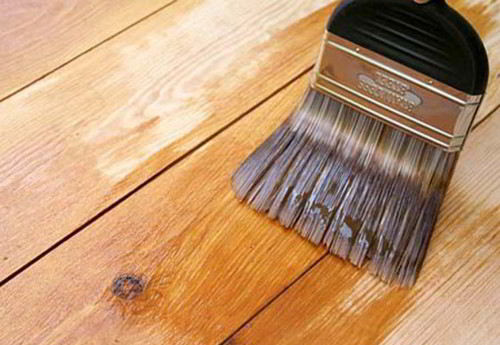
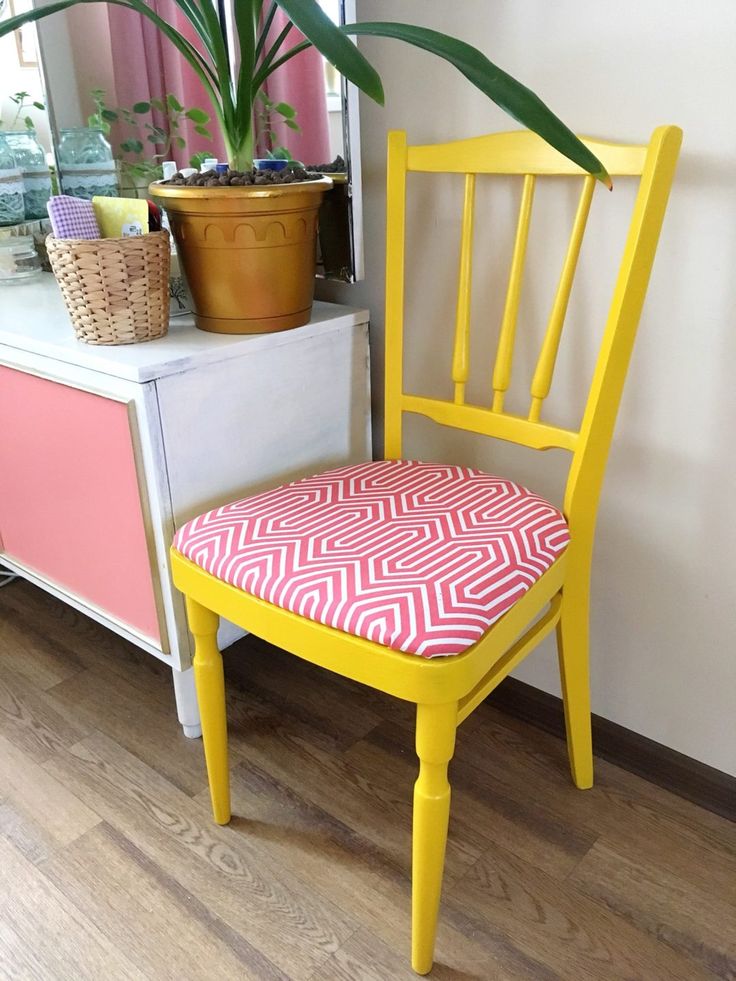
When the glue dries, you need to cut off the protruding dowel hats, putty all the holes of the screws, and then carefully grind everything. Then cover the entire surface of the wooden chair with a stain. When the initial layer dries, you can coat with varnish. It is better to apply in 2 layers. Also, the chair can be painted - latex or acrylic paints are suitable for wood.
It is better to pre-soak a chair in the kitchen or for giving with a special water-repellent agent for wood.
Product decoration
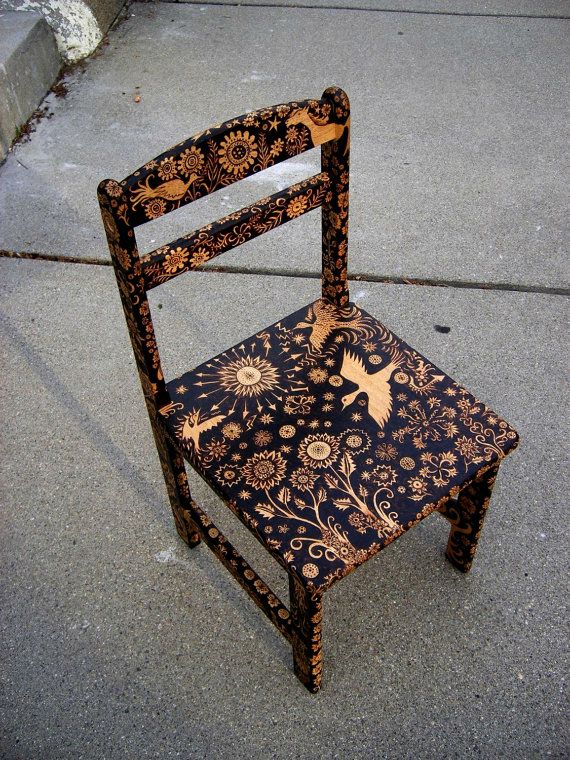
You can transform an orderly boring chair using various decorating techniques. The simplest and most popular methods:
- Pasting with a color film. The range of colors is so large that it will satisfy even the most capricious buyer. The decoration process itself does not require any special skills. In addition to the film, scissors, a metal spatula and a degreaser will be needed.
- The use of ready-made stickers for decor - they are attached to the surface of the furniture and smoothed. However, over time, products lose their attractiveness, and they will need to be replaced with others.
- Dyeing through a layer of tulle. Acrylic paint and a piece of unnecessary fabric with beautiful lace will be required. The tulle is fixed with adhesive tape, paint is applied over it (it is better to use a spray can), after drying, the material is carefully removed.
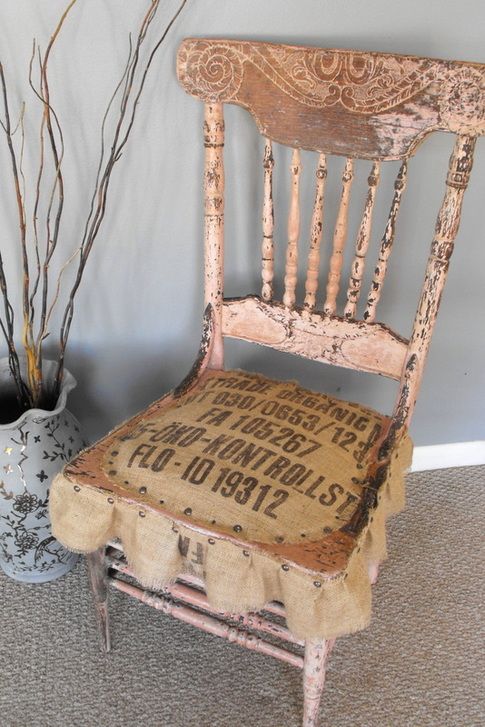
Besides staining, there are other ways to decorate furniture. A familiar and win-win decor for a chair - beautiful pillows, covers and wraps. They come in a wide variety of shapes and colors. To turn a regular chair into an exclusive interior item, you can use old curtains and tablecloths, things that have gone out of fashion, lace, ribbons, bows and much more. For example, pillows can be sewn, taking as a basis the old padding jacket. It is important to remember that all decor elements must be made removable so that they can be washed or cleaned.
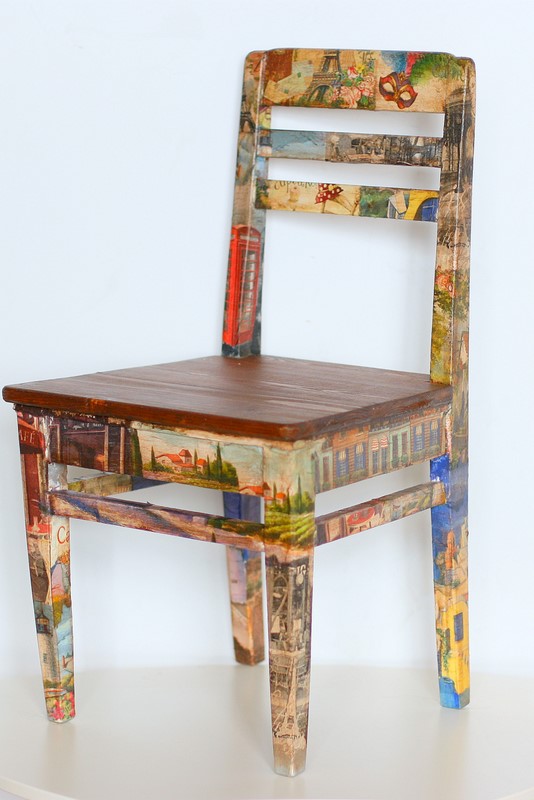
Using comic books, you can make an unusual, beautiful chair for a child. You need to cut out bright pictures, and then gently glue them on the product details at your discretion. When the glue dries, cover the surface with clear varnish. This technique is called decoupage.
Master class on making a chair from solid wood
To understand the principle of work and in the future, boldly take on curly, complex designs, you need to start making chairs with your own hands with simple models. For the manufacture of rectangular furniture with a soft seat you will need:
- 15 mm thick board;
- timber with parameters 40 to 40 mm;
- a piece of plywood 45 by 45 cm;
- foam rubber 45 by 45 cm, a thickness of 40-60 mm;
- upholstery fabric 55 by 55 cm.
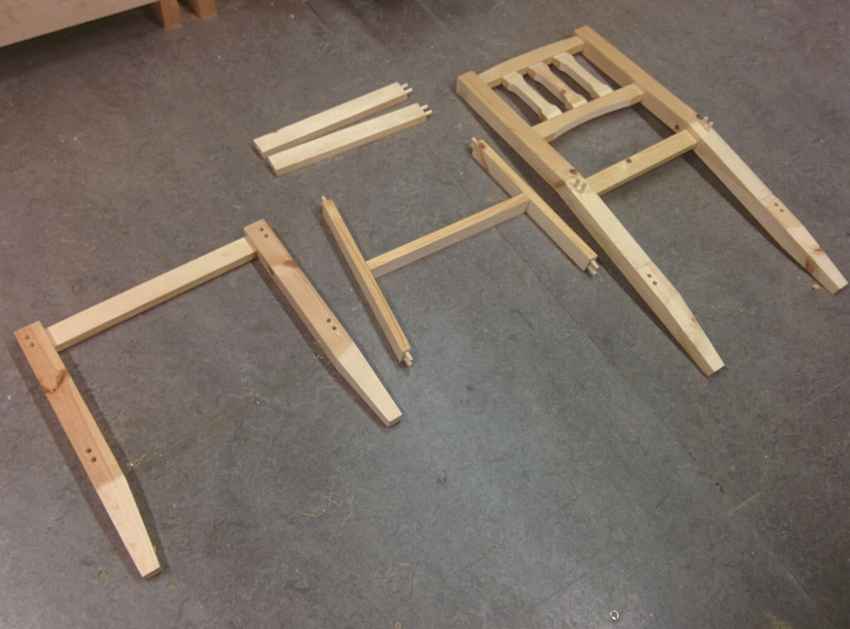
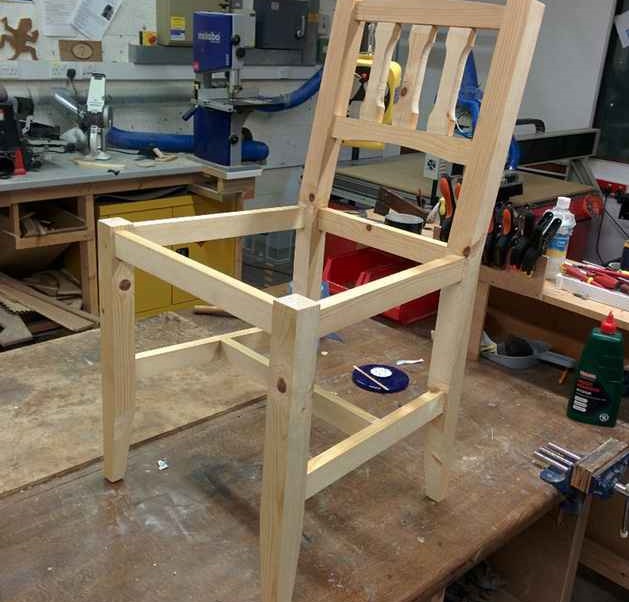
From the beam you will need to make legs, drawers, rails for the seat and sleeves, and for the back to take a trimmed board. Carry out the work in accordance with the procedure:
- Cut the tree. To do this, you need to lay out the patterns on the wood according to the share, circle the contours, and then cut out all the details according to the drawing. Identical parts immediately aligned in size. It should turn out 2 front and rear legs, 4 drawers, 2 armlets, 2 transverse rails.
- Saw out the plywood seat.
- Mark the joints for the back, legs, drawer exactly according to the drawing, using a furniture conductor.
- Make the necessary holes with a mill, clean them with a chisel. It is important that their inner edge recedes from the edge of the leg by at least 10 mm.
- Mark the sizes for the spikes on the stitches and slats (10-12 mm), and then carefully cut them.
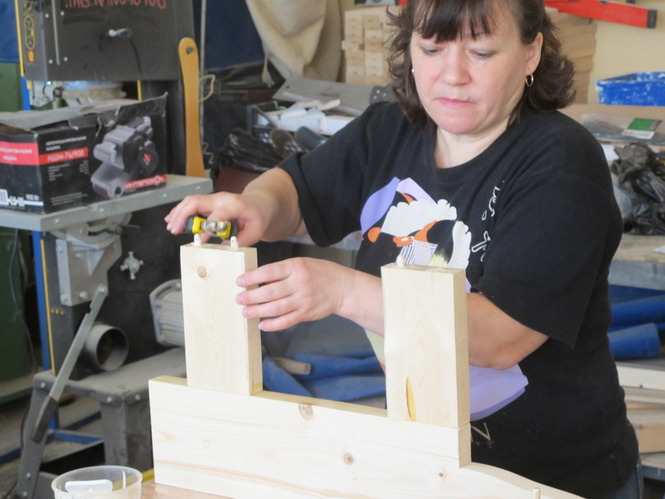
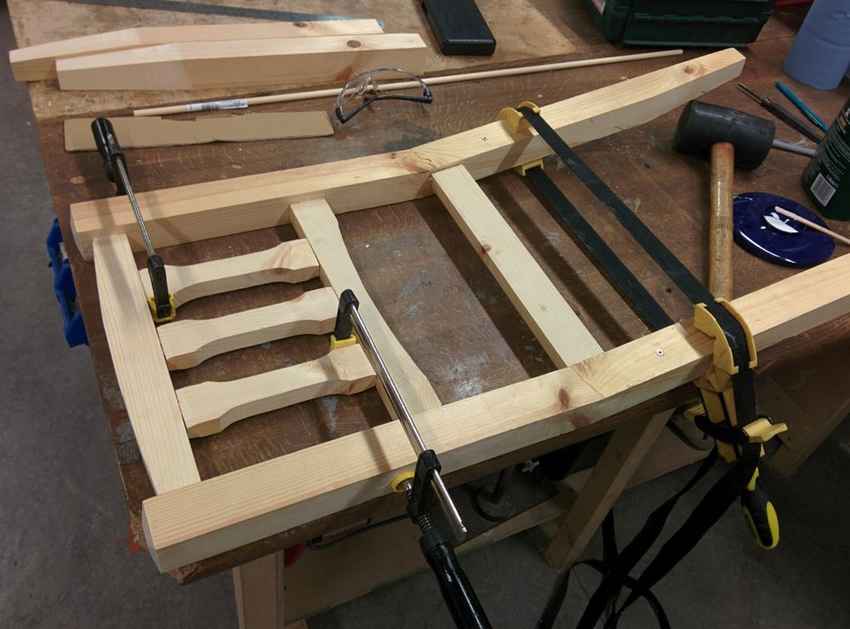
- Glue the connecting edges of the back, then insert them into the grooves of the rear legs, fasten with clamps. In the grooves near the seat also secure the rear drawer.
- Lubricate the edges with glue, then connect the front drawer with legs, allow to dry.
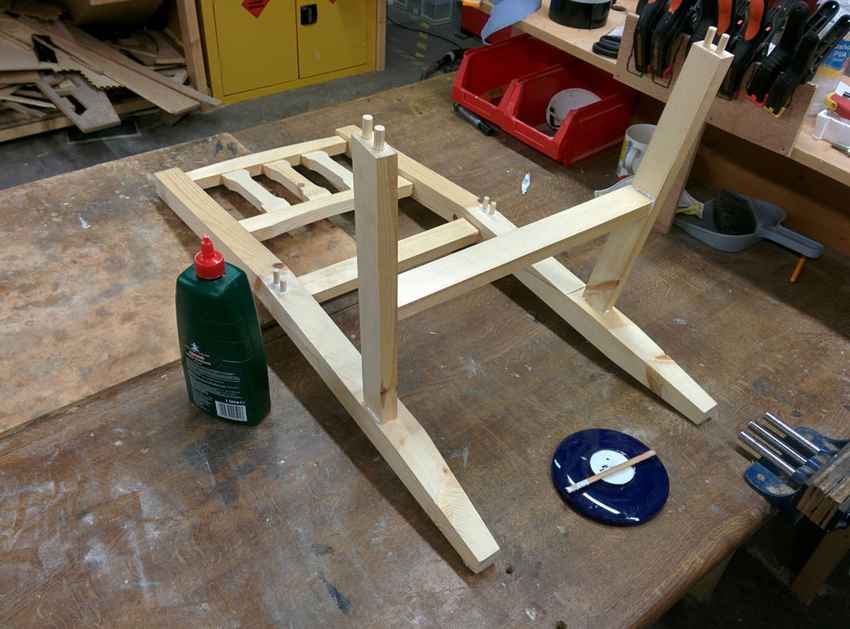
- Assemble the frame without glue - if there are no distortions, it is possible to carry out sizing and final assembly of the workpiece.
- While the chair dries, make a soft seat.
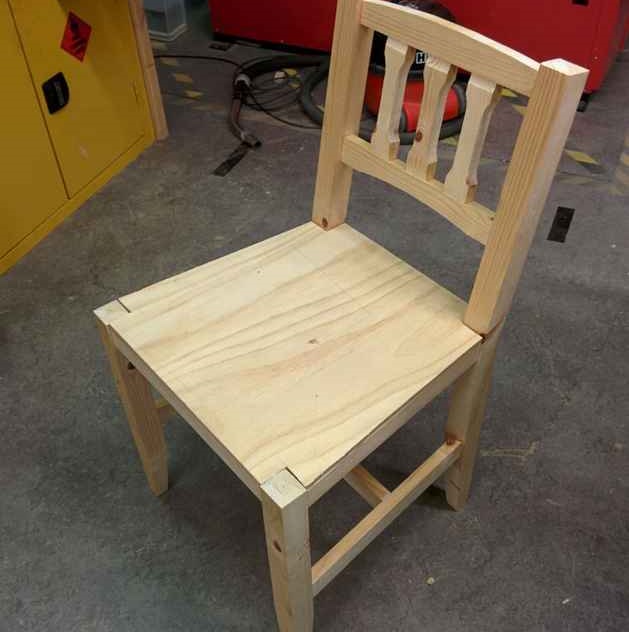
- After complete drying, fasten the sleeves, fix the rails for the seat, put the seat, fix it with screws.
- Cut off the stud heads, putty the holes from the self-tapping screws, polish the surface at the end. The corners at the ends of the legs should be rounded, the bases should be smooth so that they do not scratch the floor.
To make a worthy first do-it-yourself wooden chair, the drawings must be simple and clear, and the materials high-quality. If desired, the basics of carpentry can be mastered by any craftsman. You should start with the simplest furniture models.
Video
 (no ratings yet)