DIY step-by-step production of wood and plywood stools
Of all types of chairs and benches, the model with a hard seat without a back and armrests is considered the easiest for independent manufacture. To make a stool with your own hands, you will need the presence of carpentry tools and the suitable material - wood, plywood or even cardboard. In this case, you can choose both classic and original versions. The latter, in addition to direct use, can decorate the interior, especially if you creatively decorate products.
Content
Design and Modifications
Before making a stool, you need to think about choosing a model. First of all, furniture for seating without a back and armrests is classified by area of application. Based on this criterion, stools are:
- kitchen (in turn, are divided into classic four-legged, solid, folding, transformers, step-stools, collapsible, three-legged with a round seat and so on);
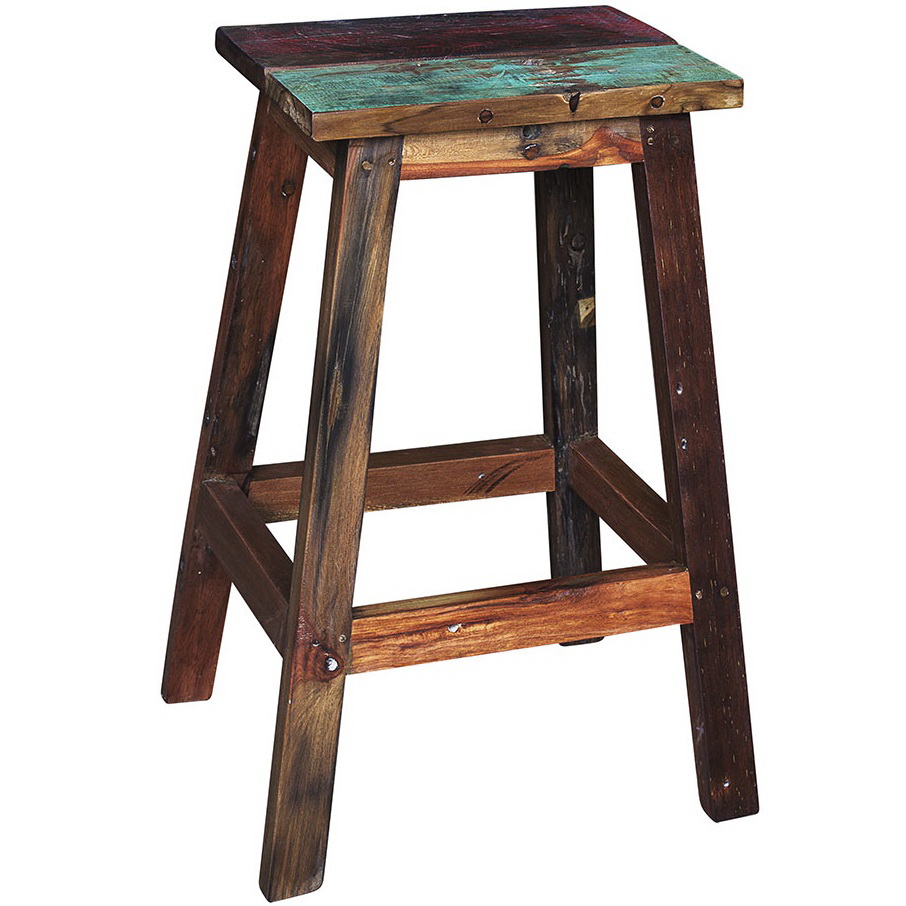
- bar (have a high seat and leg support);
- tourist (usually folding, made of lightweight, weather-resistant materials);
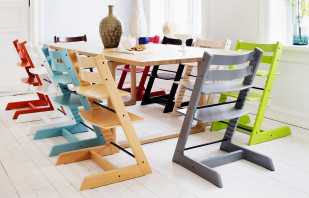
- musical (the design is adjustable in height);
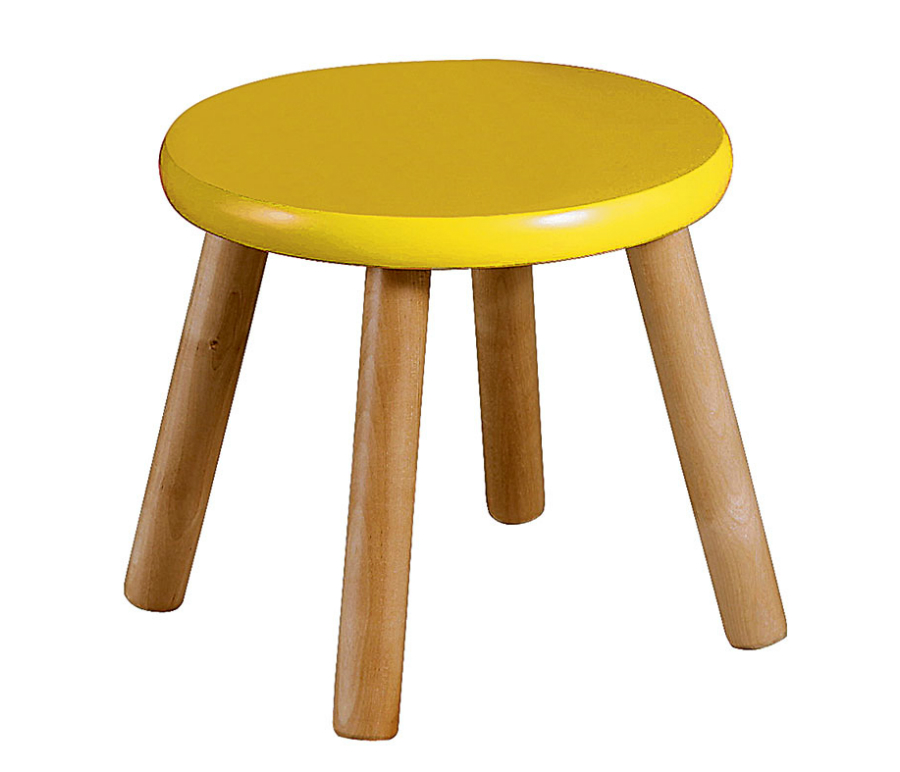
- children or adults;
- garden;
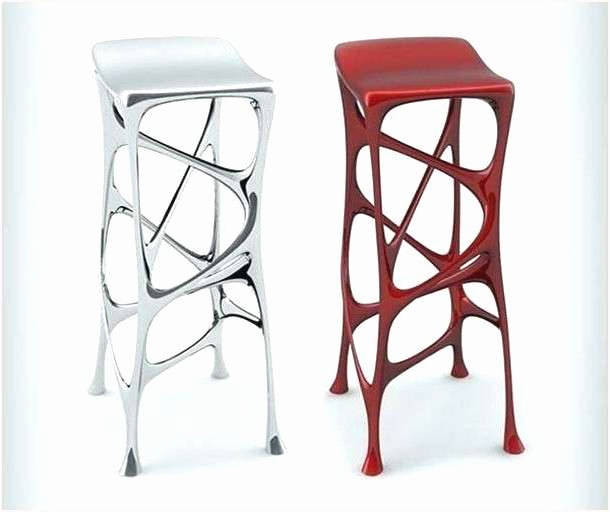
- design, made in the Art Nouveau style.
In addition, they differ in shape, softness of the seat and the design of the supporting elements. Seat stools come in different configurations and degrees of stiffness: square, round, wicker, soft and hard. Models, depending on the design, can rely on four or three legs.
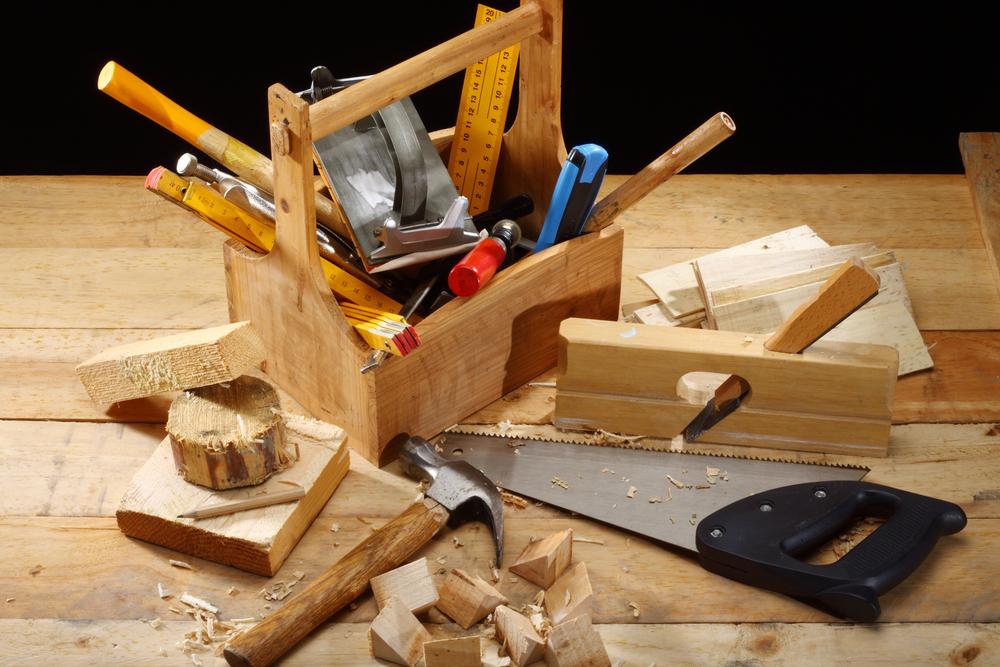
Material and tool selection
For the manufacture of stools in a small home workshop, you will need a standard set of carpentry tools for woodwork and some consumables:
- hacksaw;
- plane;
- chisel;
- screwdriver;
- Phillips screwdriver
- Sander;
- jigsaw;
- clamps;
- square, tape measure, pencil;
- manual frezer;
- Workbench.
To make the legs and frame of a homemade stool, you will need a natural tree. For seats, you can take plywood, MDF, particleboard. In addition, wood glue, adhesive tape and fasteners (screws, screws) will be required.
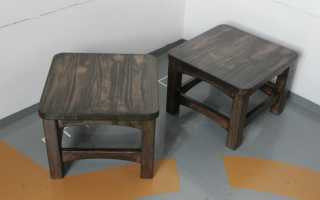
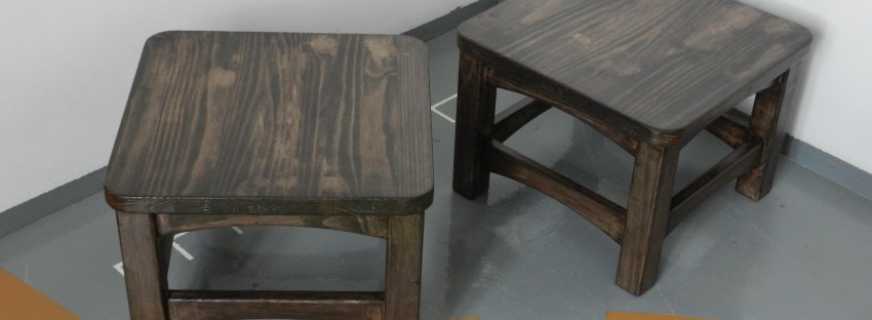
Tree
A simple wooden stool will find its place in any home. Some models are pretty straightforward. Experts recommend using pine, birch, oak, beech, walnut. These types of wood are easily processed. Seats for stools are best made from boards. Suitable edged solid board or finished furniture panels. If there is no suitable lumber, you can use chipboard.To make a stool from solid wood is quite expensive, time-consuming, and therefore impractical. Legs for such models are made of bars. If you wish, you can try to make a product with round legs, which are machined from a bar on a lathe. Ready-made balusters are another good option for turned legs for stools.
Coniferous varieties of lumber are distinguished by their resinousness. The cutting edge of the tool bends and quickly dulls. The disadvantage is that products from them are easily scratched.
Plywood
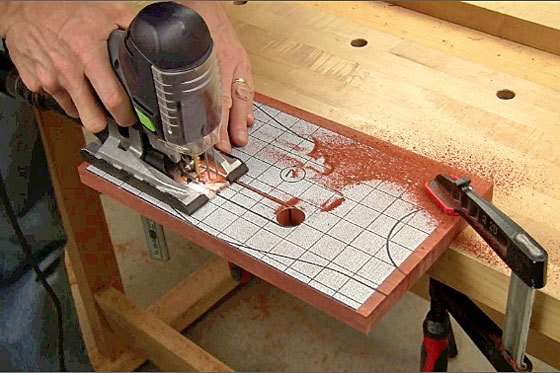
You can make a stool from plywood. This is quite affordable material, from which it is worth trying to make a simple model yourself. However, working with plywood has a number of features:
- Cutting blanks is a more time-consuming operation than working with wood. This is due to the fact that the raw material consists of multidirectional fibers and a viscous adhesive layer.
- Sheets with a thickness of more than 6 mm are best cut with a circular saw.
- You need to work with plywood along the fibers. If you need to saw the outer layer across, you must first make the weakening cuts with a knife, and then finish them with a jigsaw.
- Before screwing in the screws, holes of a suitable diameter are drilled.
The thickness of the sheets used depends on the type of product. It happens from 6.5 to 18 mm. For household carpentry, as a rule, FSF and FC plywood is used and the cheaper option is Sh-1, with one side polished. It should be borne in mind that with a small thickness of the workpieces, the structure must have stiffeners. If you wish, you can make do-it-yourself plywood stools with your own hands.
Cardboard
You can create graceful stools with your own hands from durable cardboard with the help of elementary skills of cutting and gluing. Such furniture is an original design project for beginners. The product is also useful if you need more seating for a party. You can find quite a few interesting designs of stools that are easy to repeat at home.
For the manufacture of cardboard furniture you need a minimum of tools and consumables:
- glue;
- stationery knife;
- scissors;
- sandpaper;
- Scotch;
- roulette.
A durable product will be obtained using a three-layer corrugated cardboard. If the thickness is insufficient, you can simply glue the layers together. When joining, it is desirable to change the direction of the stiffeners for greater strength.

How to determine the optimal dimensions
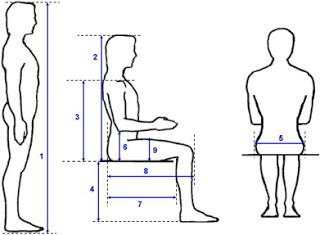
The main dimensions of the furniture are selected in accordance with the average anthropometric data of an adult. The functional dimensions are designed for an average height of 175 cm. The parameters for children are calculated depending on their height.
The correct angle of bending of the knees when sitting should be at least 90 degrees, while the feet should be completely on the floor.
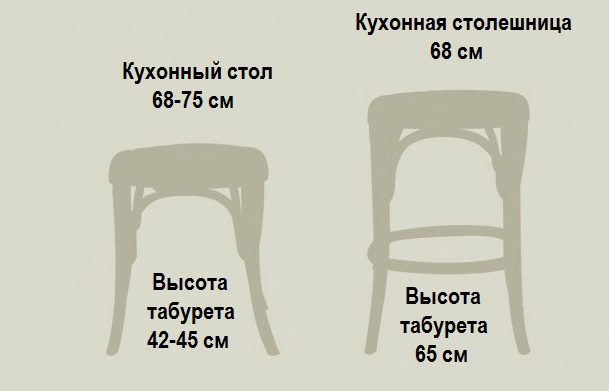
To make a stool with your own hands, you need to consider only two sizes: the height from the floor and the width of the seat. Ideally, the seat height should reach the knees of a standing person. The full height of the chair is calculated depending on the dimensions of the kitchen table. If it provides a level of 680-750 mm, then a convenient stool height will vary from 420 to 450 mm. With a kitchen worktop height of 680 mm, the parameters on the stool will increase to about 650 mm. For the size of ladders, the height of the hinged kitchen furniture is taken into account. With an average growth of the hostess (158-160 cm), it is 450-650 mm. Comfortable seat width - at least 360 mm. The design of the stool requires a clear balance between the height, width of the seat and the shape of the lower part. Failure to comply with these parameters will result in poor product stability, fall, and personal injury.
Manufacturing workshops
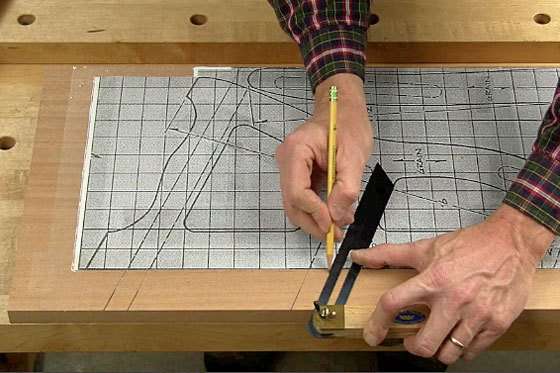
Before you make a stool with your own hands, you need to draw a detailed diagram with the dimensions. You will also need to cut out the patterns. Simple drawings of general stools should give a complete picture of the design of the product, the number of external elements sufficient for assembly.
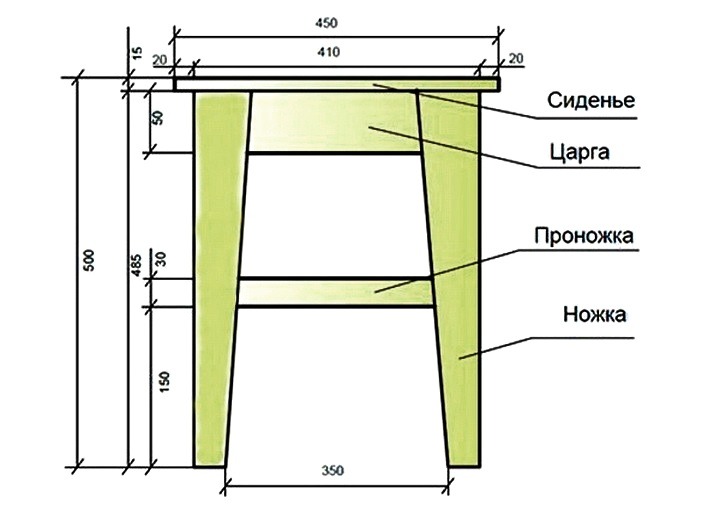
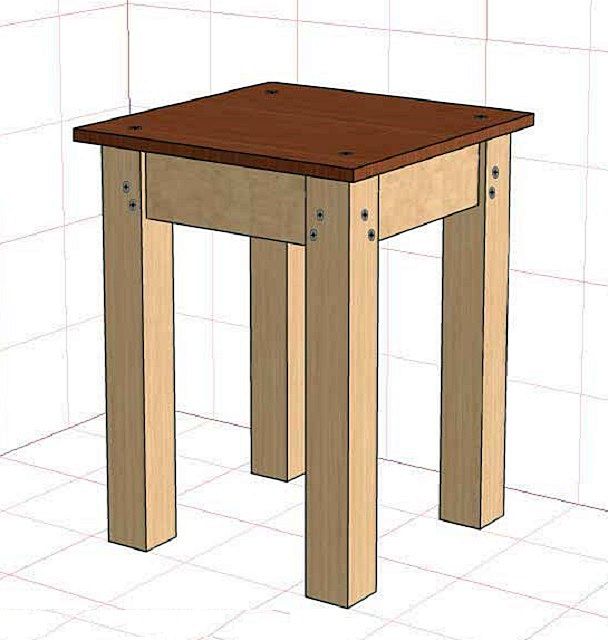
Kitchen wooden
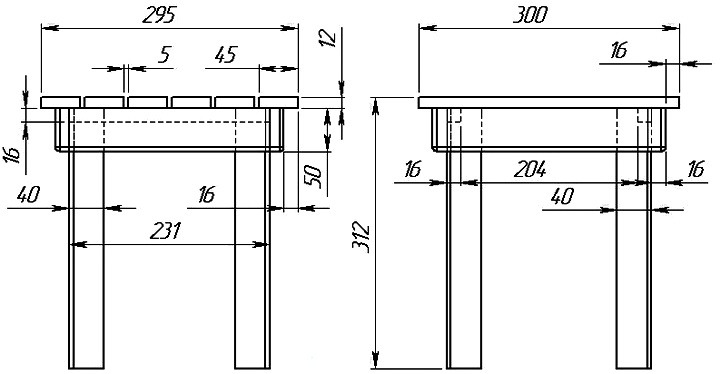
For your own kitchen, you should try to make one of the lightest models - a classic wooden stool. First, a drawing is drawn with the desired parameters. For simple models, you can draw schematically, by hand.
In addition, before you make a stool with your own hands, you will need to prepare materials:
- Edged board for a square seat 60-70 mm thick. Sidushka whole or from boards. The size of the side of the square is 300-400 mm.
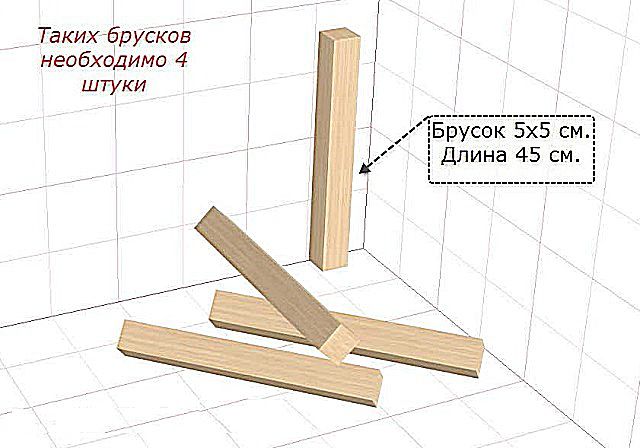
- 4 legs for a stool made of wooden timber with a section of 35 × 35 or 50 × 50 mm. Length - 400-500 mm.
- Drawn bars - 4 pieces, size - 290 x 60 x 20 mm.
- 4 cuts, size - 290 x 20 x 20 mm.
- “Rusks” (bars of arbitrary sizes).
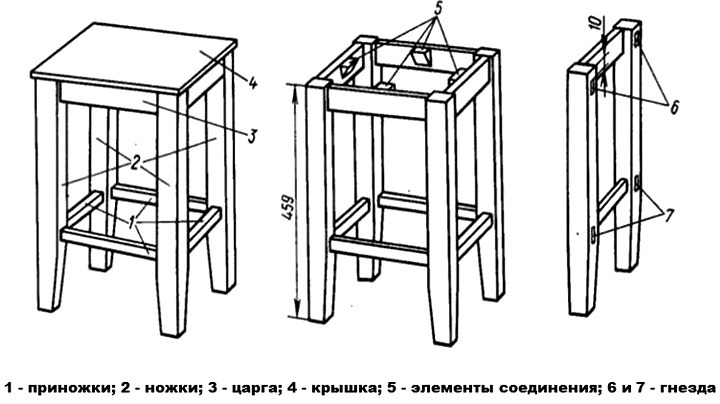
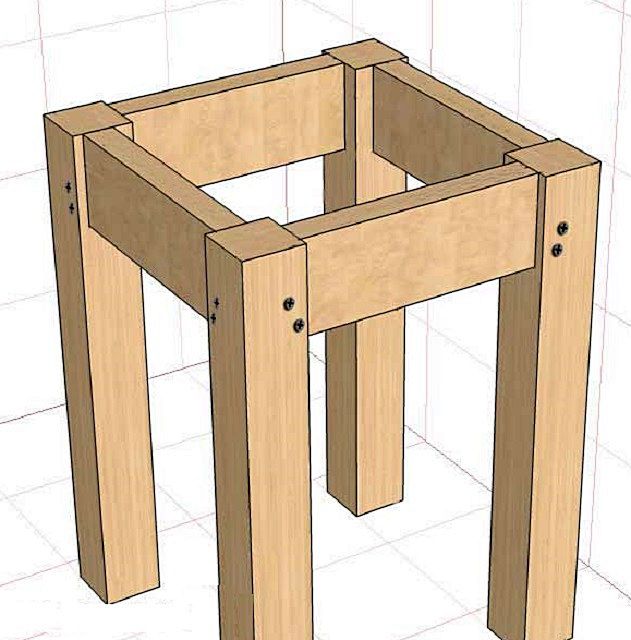
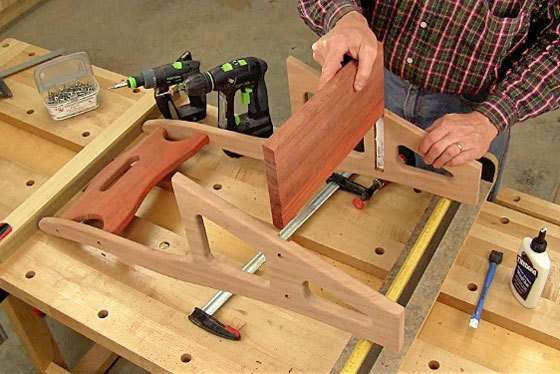
You should follow the step-by-step algorithm for assembling a wooden stool with your own hands:
- blanks are sanded with sandpaper to remove bumps and roughness;
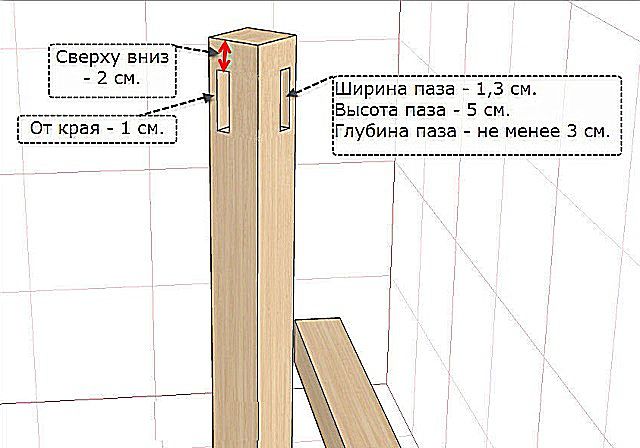
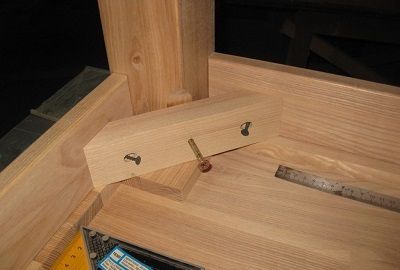
- on the legs are marked the attachment points of the tsar and cuticles;
- holes for self-tapping screws are drilled;
- “dry” assembly of the product is carried out;
- parts are additionally fastened with glue, then with screws;
- a seat is mounted on the resulting frame of the stool.
For carpentry made of wood with your own hands, drawings and diagrams in finished form can be taken on thematic resources - this will help not to make a mistake with the dimensions.
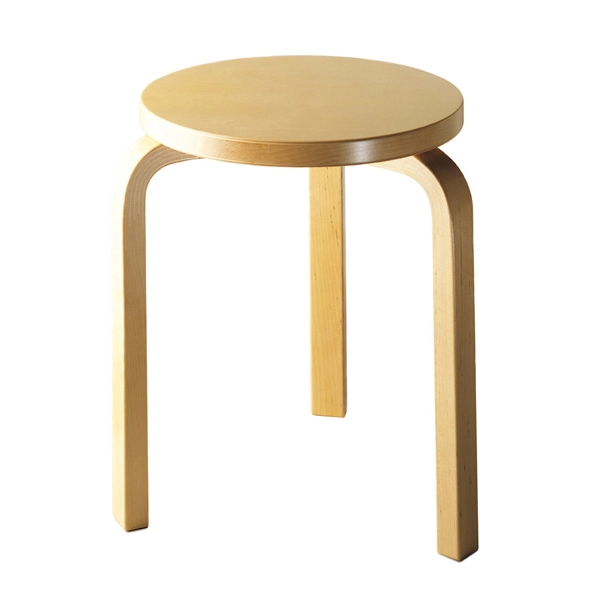
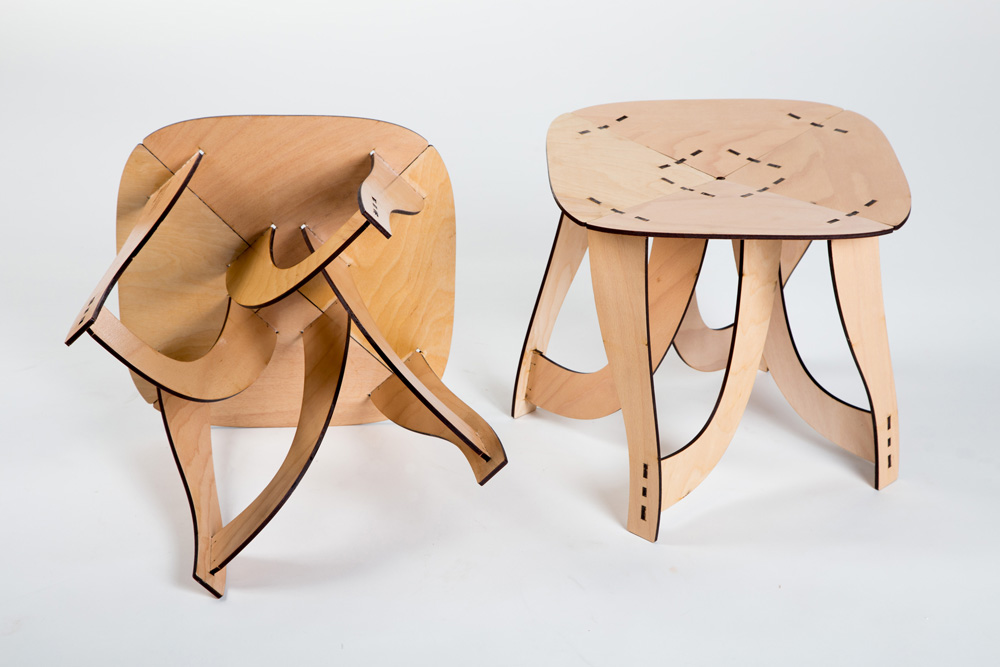
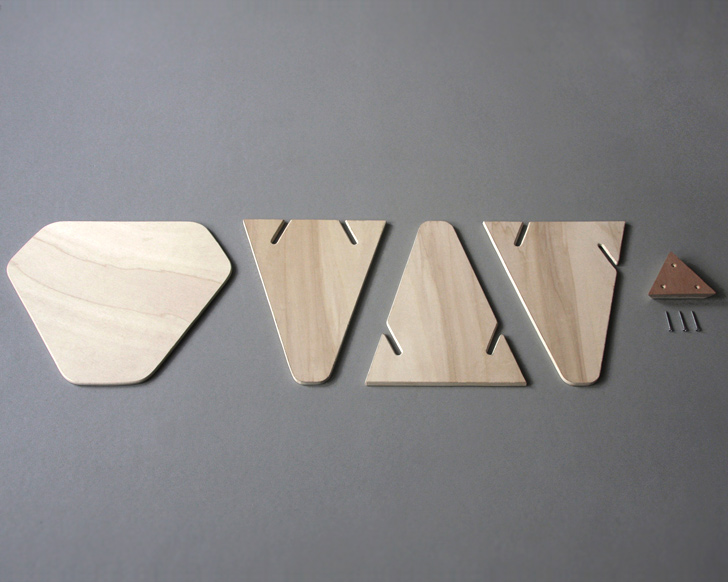
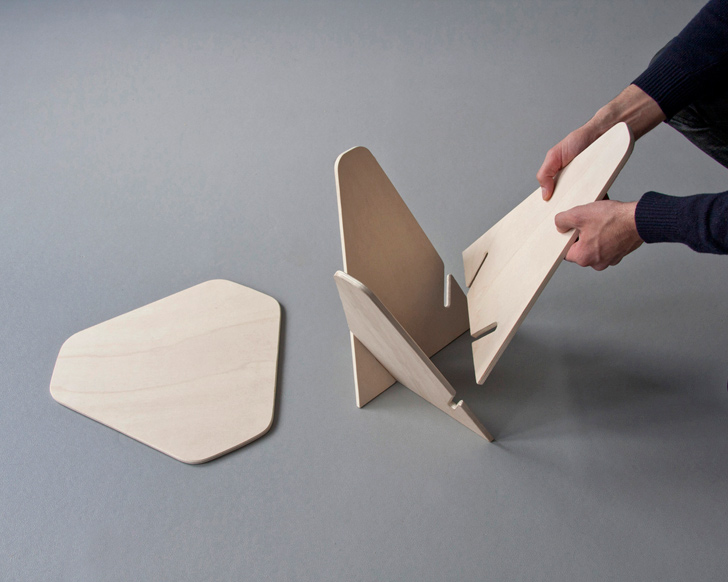
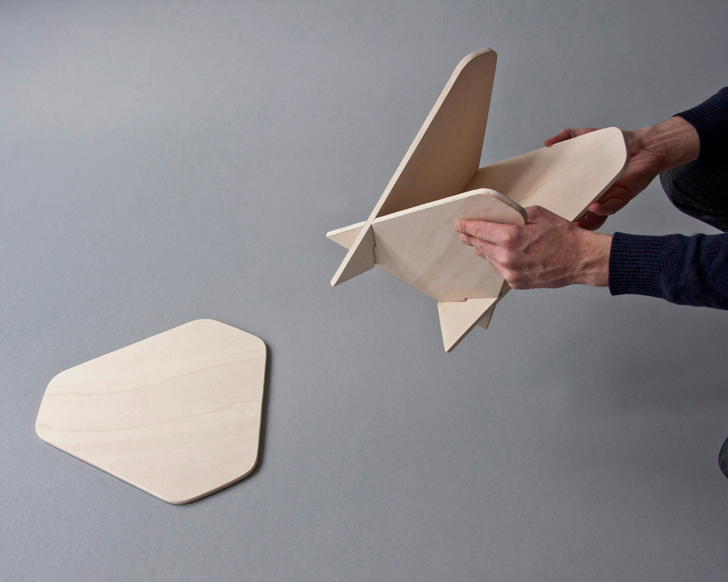
Simple of plywood
A good product will be able to build only three parts with grooves. Such a stool from plywood with your own hands is done simply, it is only important to draw the correct drawing and complete the patterns.
The product requires the following blanks:
- seat diameter 350 mm;
- 2 legs 420 mm high, width above - 200 mm, below - 350 mm.
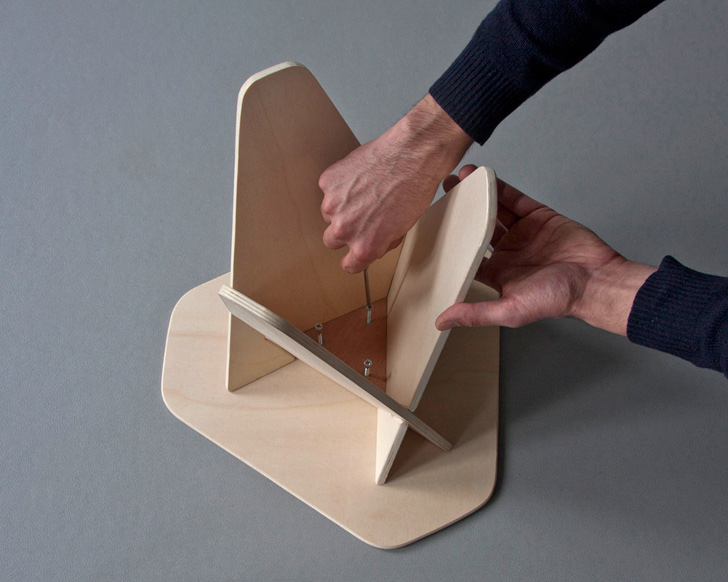
The assembly algorithm for such a construction from plywood is not difficult:
- The base of the stool is connected using grooves that fit onto the glue.
- Seat fixtures are made using self-tapping screws.
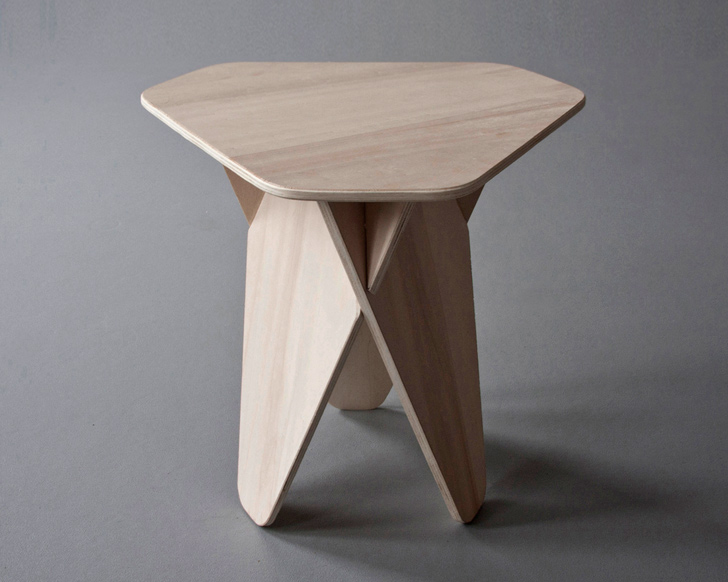
After assembly, it remains only to sand all edges. The finished product is coated with colorless varnish. After drying, the stool can be used.

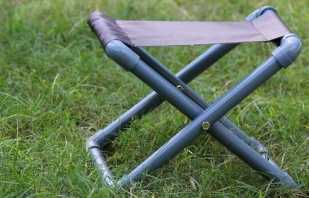
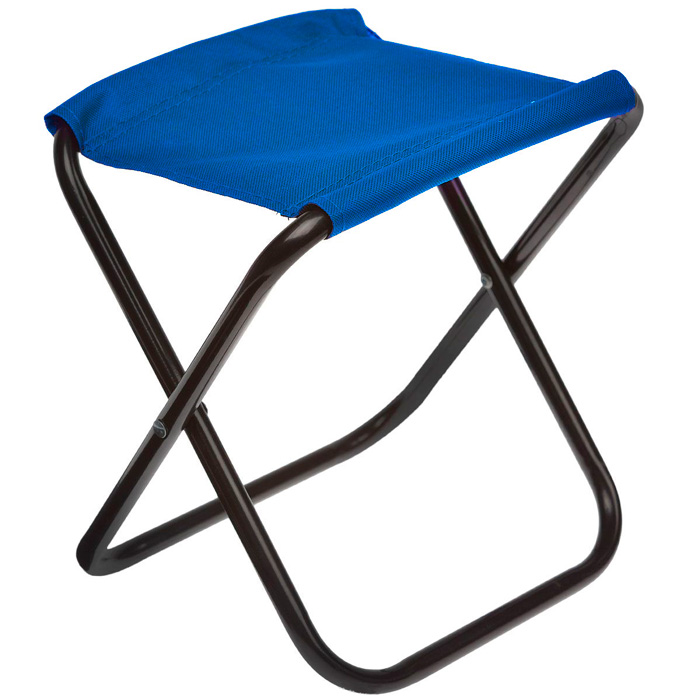
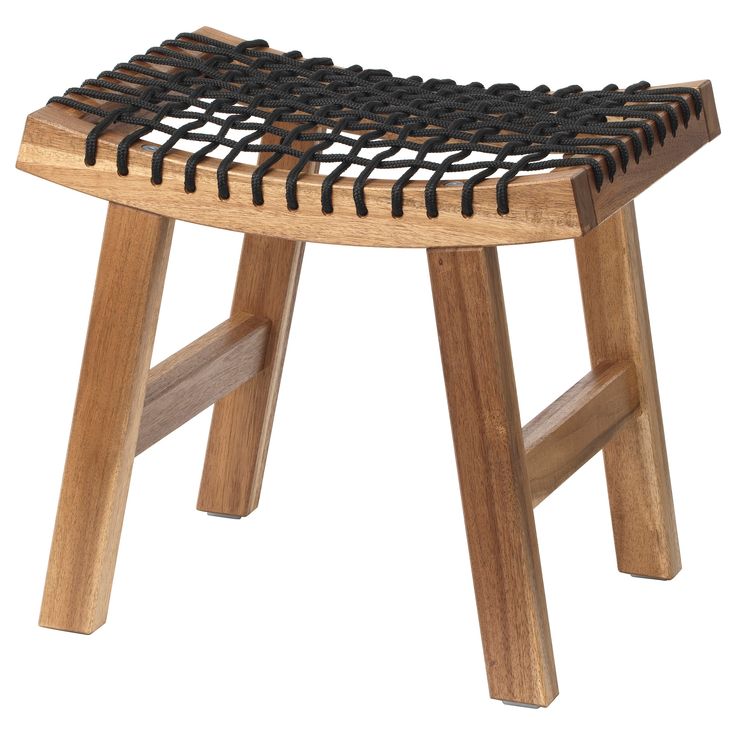
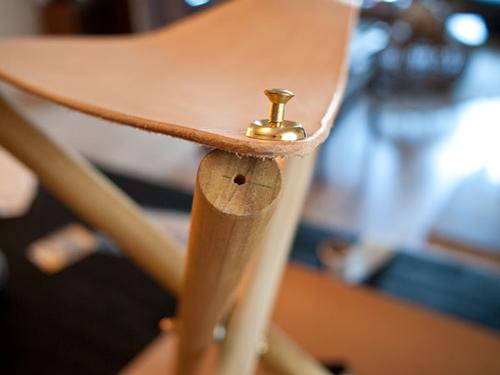
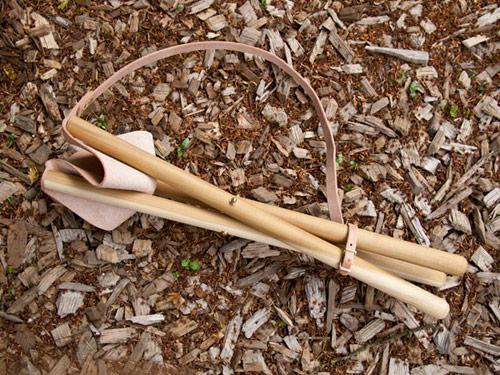
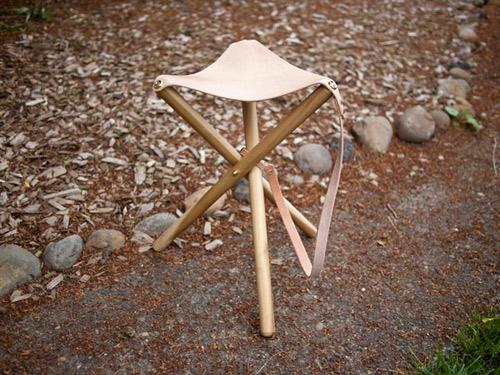
Small folding tripod
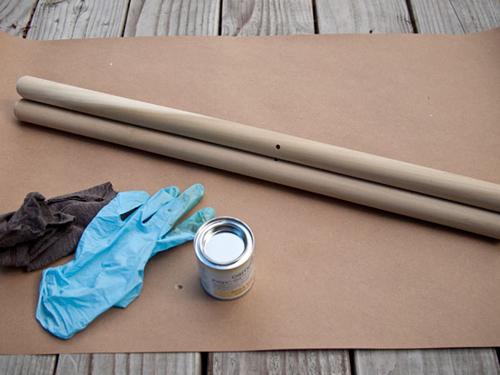
This tourist variant of a stool made of wood consists of three legs and a canvas triangle for the seat. It can be easily done without a scheme with your own hands and used in a hike, fishing.
The blanks are very simple:
- 3 wooden pins 65 cm long (shovel cuttings can be used);
- long bolt, 2 washers and nut;
- anchor bolt with washer and nut;
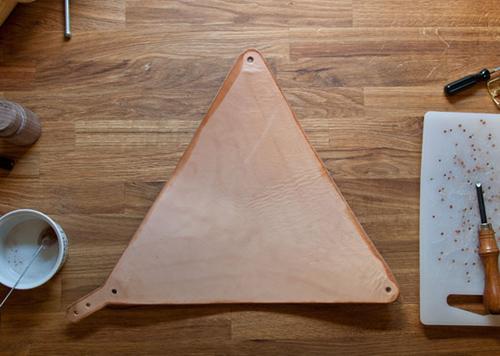
- tarpaulin triangular seat with side length 40 cm.
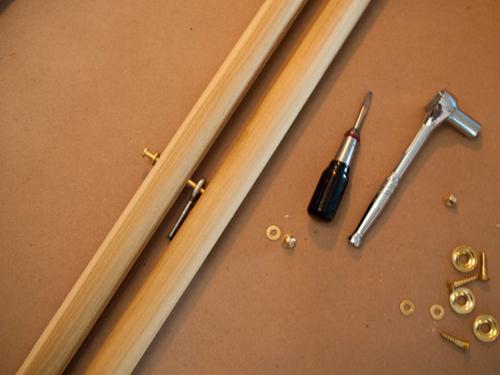
A step-by-step assembly algorithm provides a minimum of operations:
- on pins, drill holes for fasteners at a distance of 28 cm from the edge;
- at the ends of the triangular seat, fix the screws with the washer;
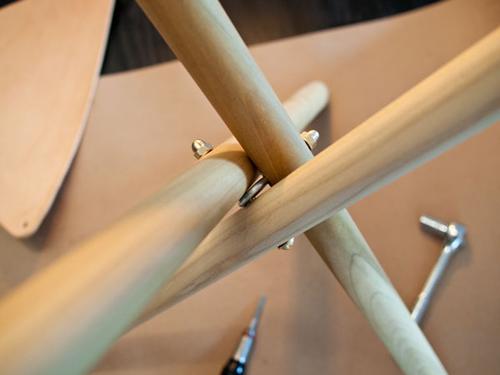
- connect two wooden pins with a long bolt, placing an anchor bolt between them;
- put the third pin on the anchor bolt and fix it with a washer with a nut;
- Screw the fabric seat into the end of the pins using three screws.
A folding tripod stool made from improvised materials is useful for quick camping on the hike. It can be made from cut branches and any canvas for a seat.
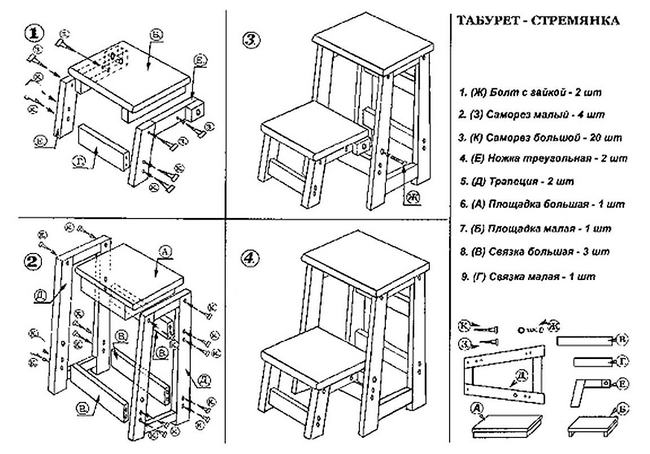
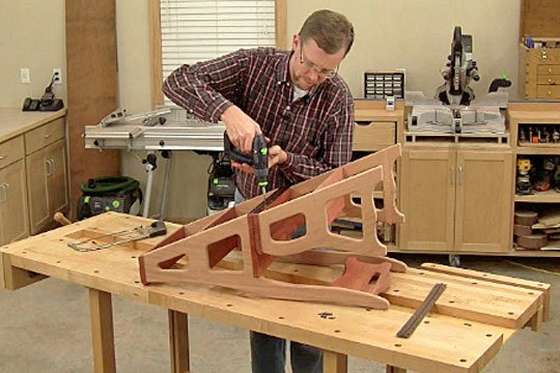
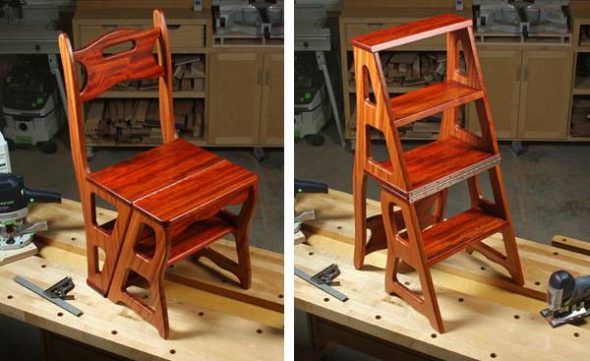
Step stool
A multifunctional piece of furniture that combines a seat and steps, as well as the simplest design that you can do with your own hands - this is a wooden kitchen stool-ladder. The height of the product itself is 620 mm, and the steps are 250 mm.
For this model, blanks are made from any durable material:
- for a stool - a base, 2 sidewalls, a rectangular seat, 4 transverse trims;
- for a sliding step - 2 sidewalls, a back wall and the basis.
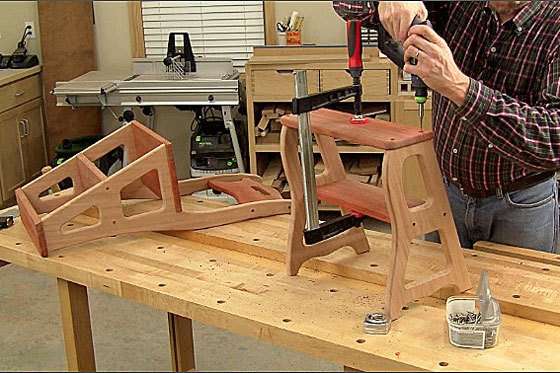
Do-it-yourself staircase and wooden stool are assembled according to the following algorithm:
- cut the wooden blanks of the stool-stairs according to the scheme;
- with the help of screws, attach the side and rear walls to the transverse bars;
- fix the retractable step using the piano loop;
- finish processing of the product - grinding, painting.
The scheme of this design requires accurate execution, because stepladders are experiencing a serious operational load.
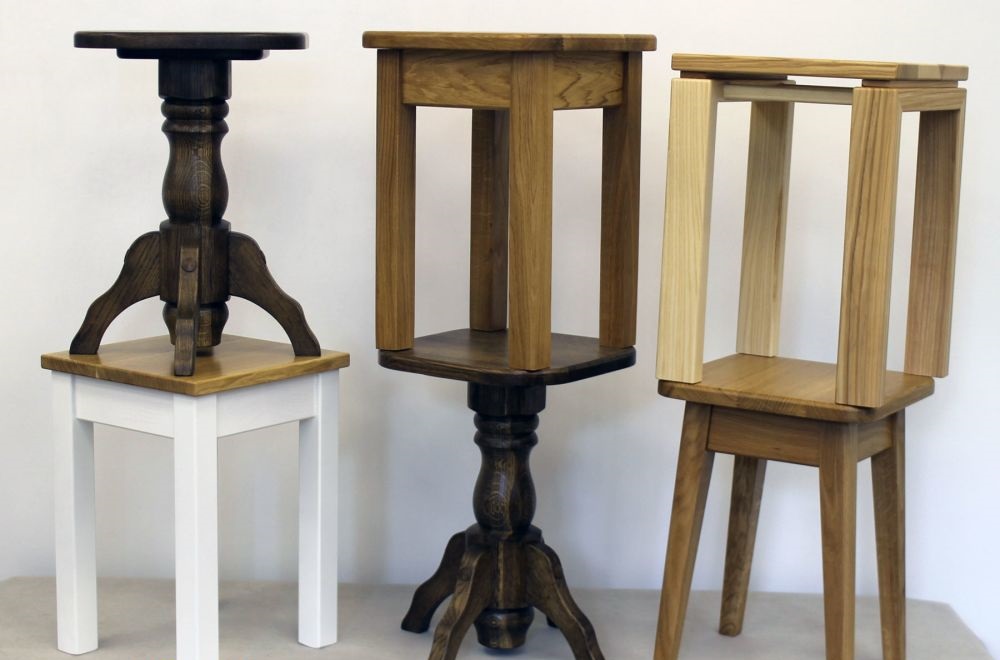
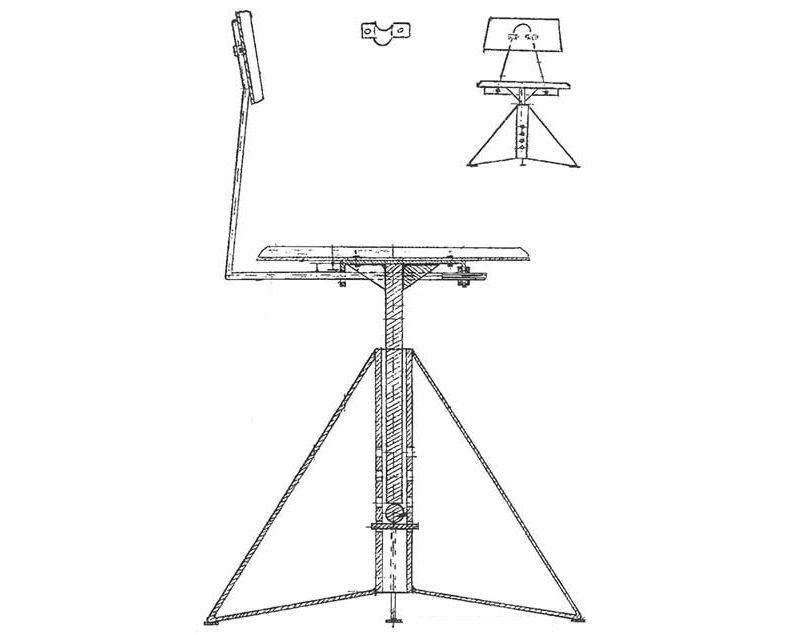
Rotating
Spiral chairs are used when playing the piano, working at the computer. It is not easy to make a rotating stool for a beginner carpenter, since the rotary mechanisms have a complex metal structure. Additionally, you need a drilling machine and a welding machine. If you managed to make a swivel chair with your own hands, you can try to make a chair using the same technology.
For the construction you will need such materials:
- pieces of wire rod with a diameter of 10 mm (length - 62 cm) - 4 pieces;
- a metal pipe with a diameter of 25 mm and a length of 30 cm;
- camomile washers from steel 1 mm thick;
- rubber plugs (so that the legs do not spoil the floor);
- steel bar 1540 mm long;
- bolts M 6;
- plywood for the seat (400 × 400 mm);
- metal pin 300 mm long;
- countersunk bolts.
The manufacturing process consists of the following steps:
- bend legs from wire rod sections;
- in the pipe we drill 4 through holes with a diameter of 8.2 mm, retreating from the edge of 80 mm;
- weld legs to the pipe;
- we weld camomile washers to the ends of the legs and insert rubber plugs into them;
- on a steel bar we cut the thread M 12;
- give the bar a shape in accordance with the scheme;
- in a steel plate measuring 350 × 180 mm, drill 4 holes for attachment to the seat and give it a U-shape;
- in the center of the pin, drill a hole for a metal ball;
- weld a U-shaped plate to its other end;
- we collect all the details of the mechanism together and attach the seat using countersunk bolts.
To make the seat soft, you can glue the foam and cover it with cloth, securing it with a stapler and staples.
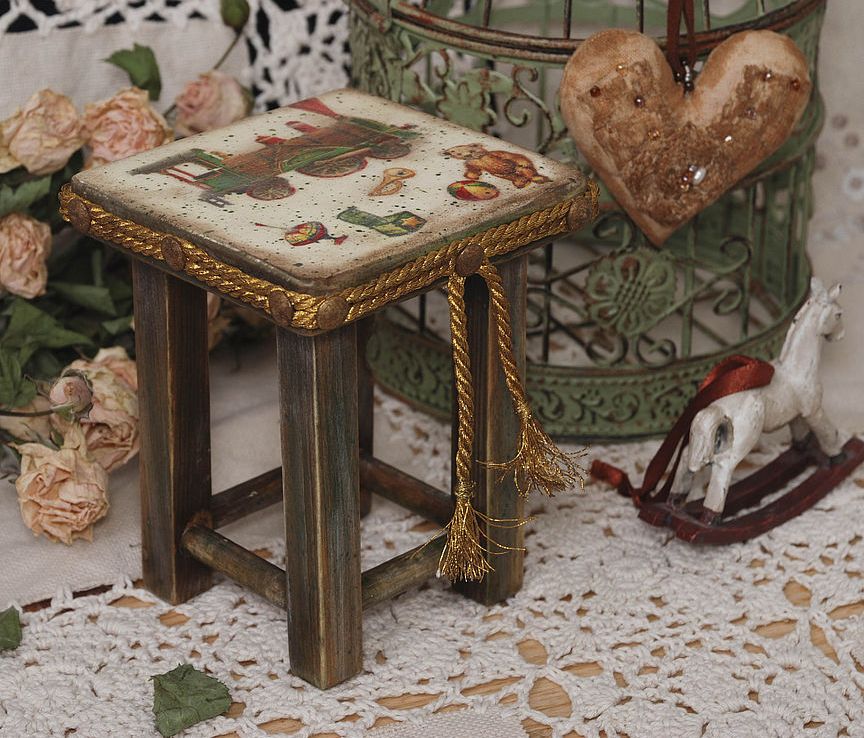
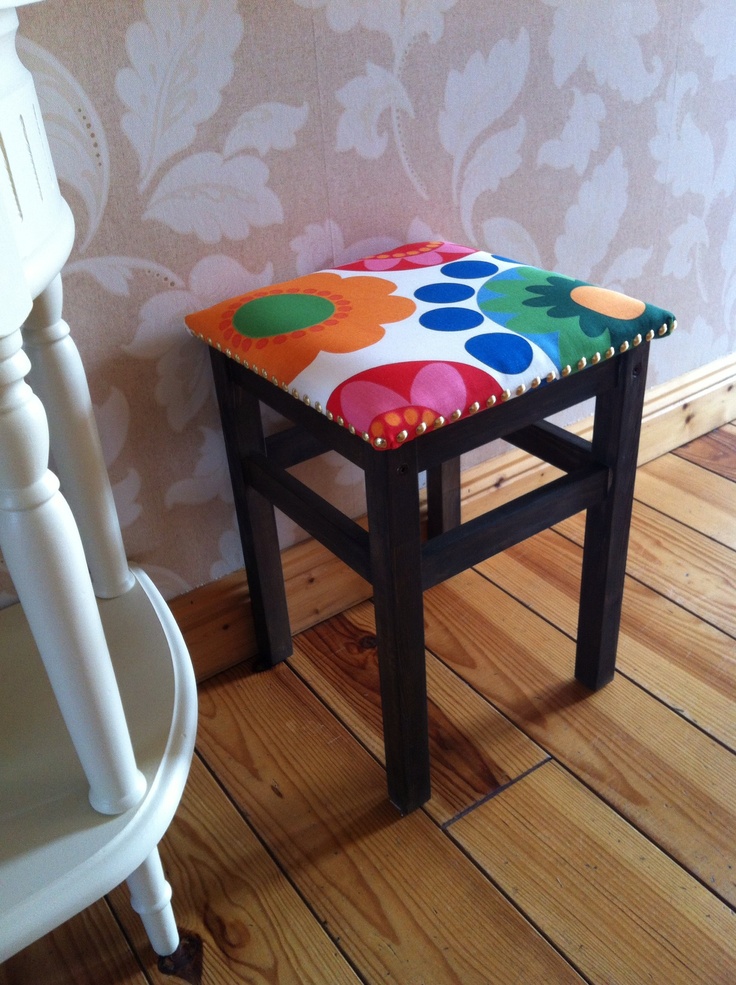
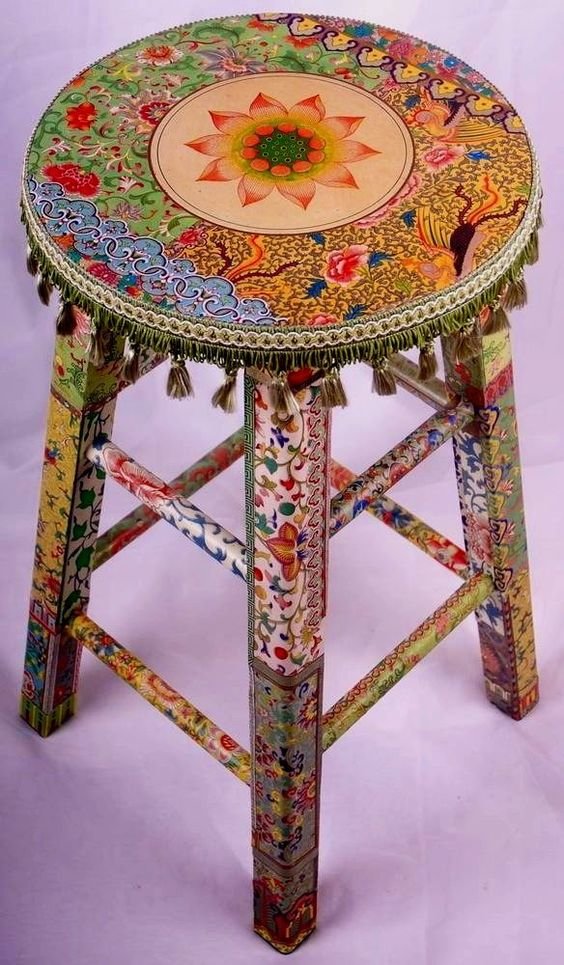
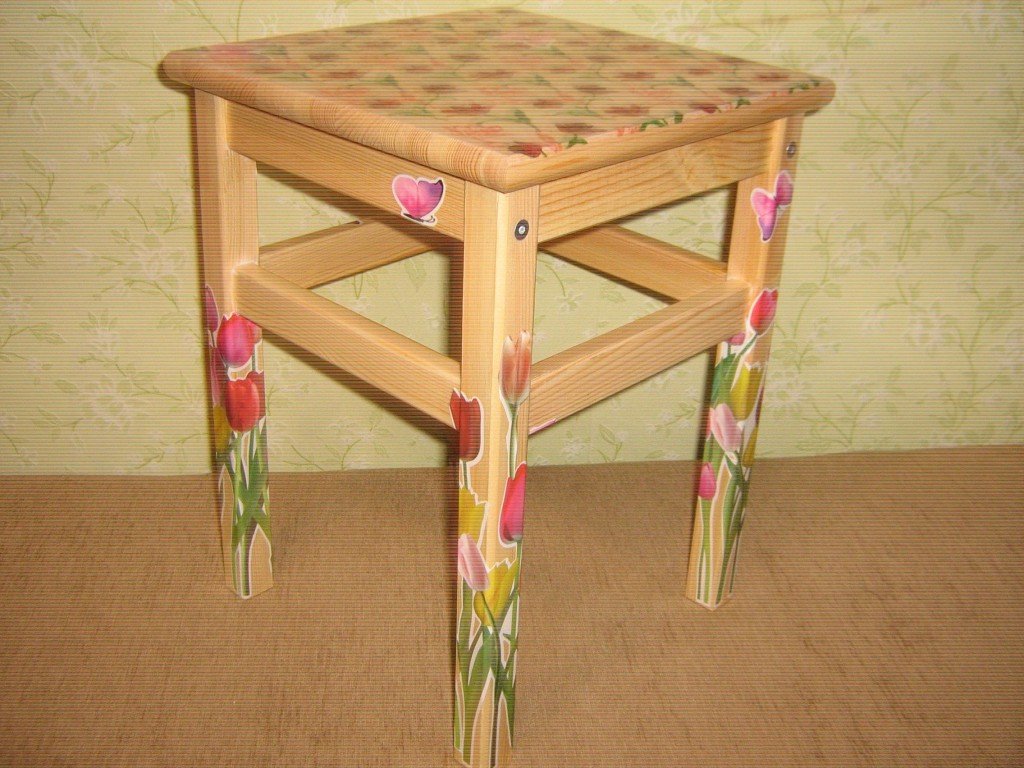
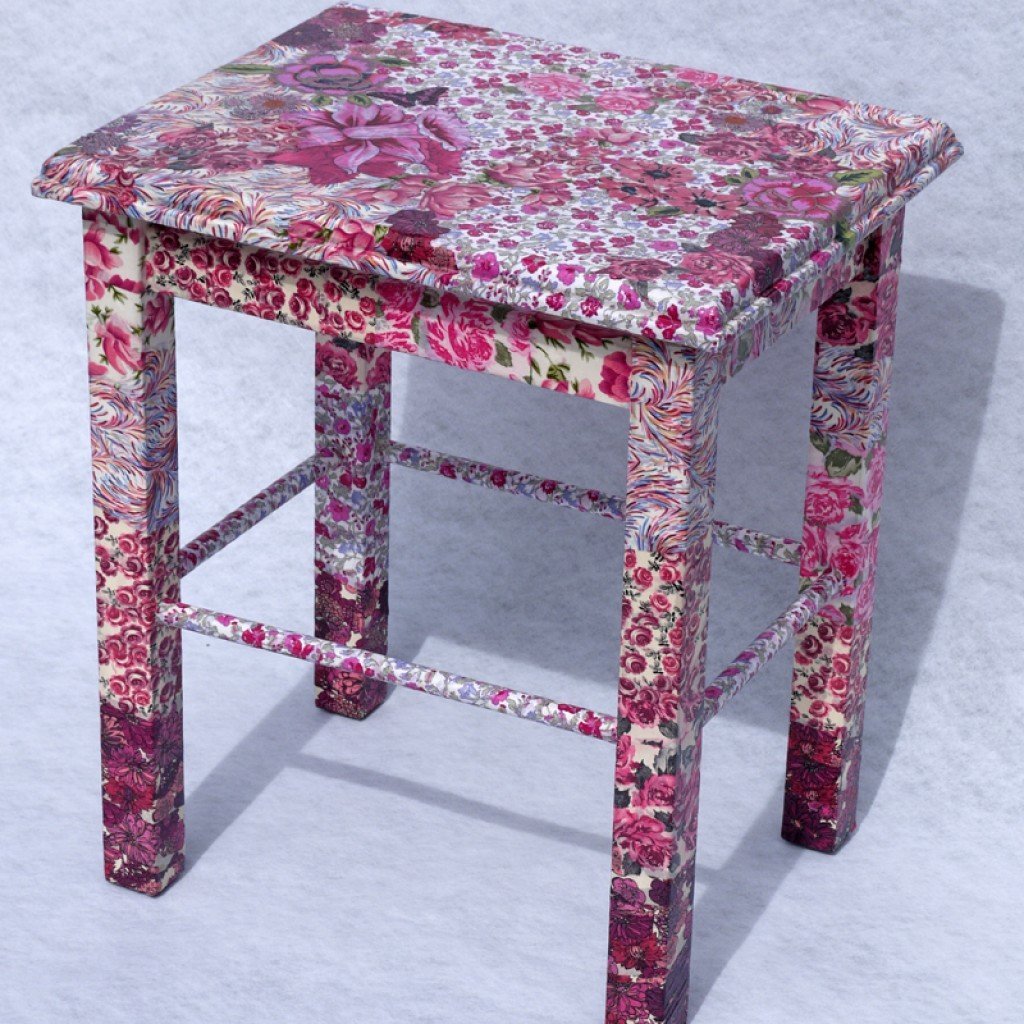
How to decorate a product
There are different options for finalizing a stool with your own hands after manufacturing - it all depends on the imagination of the master. You can cover it with varnish, stain, acrylic, apply decorative patterns. Decorating a room using decoupage technique is a popular trend in furniture design. With it, without much money, you can transform homemade stools depending on the style of the room. Furniture is decorated with napkins, photographs, old newspapers, pages from books or music notebooks. In this way, you can decorate the interior in a trendy vintage style or in the French style of Provence. In addition, it is possible to sew soft covers on the seats. Crocheted wraps give the stool a unique look. In cases when the style of the interior changes during the repair, it is possible to emphasize the individuality of the home by decorating with fabrics. The appearance of the product will also change when wrapping its parts with a jute rope.
Self-made stools require minimal skills for working with carpentry tools. However, as a result of small efforts, you can get a high-quality, and most importantly, an exclusive piece of furniture that will serve its owner for many years. And if you creatively approach the process, fairly simple furniture will become a real work of art.
Video
 (votes: 1, average rating: 5,00 out of 5)